Skip navigation

Tag Archives: soundboard

Here are a few photographs of a recently completed steel string guitar. It’s based on a Martin ‘OO’ model but I’ve added, although that’s surely the wrong word, a venetian cutaway. The soundboard is Sitka spruce and the back and ribs are English walnut. I used holly for the bindings and tail stripe, and Rio rosewood for the bridge.


My friend, Dave Crispin, came to the workshop to try it out a few days ago and while he was playing I captured a few moments on an Edirol recorder.


Advertisement

A while ago, I wrote about repairing the damaged soundboard of a cedar topped guitar. And I’ve recently had to deal with a similar problem, this time caused by the lid of the case falling on the guitar as it was being lifted out. The damage wasn’t structural but it did leave some conspicuous dents.

The soundboard had been finished by French polishing and I reckoned that simply re-polishing the damaged area would be almost enough. However, first, using a hot (but not too hot) iron and some wet kitchen paper, I steamed out the dents. When dry, I lightly sanded the area before brushing several coats of clear shellac into the places where the polish had been chipped off. After a couple of days to allow it harden, I sanded again with 1500 grit paper to level the area and then re-polished the whole of the lower part of the soundboard in the traditional way using a pad to apply the shellac. Another few days for the shellac to harden, a quick buff up with some burnishing cream and damaged area was almost invisible.

But not completely invisible because, viewed in certain lights, the repaired areas were just identifiable as slightly paler patches. You can see them in the photograph below. I had exactly the same problem with the last repair and I don’t know how to eliminate it. This time I tried exposing the bare wood to UV light for a few hours before applying any shellac but I’m very doubful that it made any difference. Maybe I should have left it under the UV light for longer. If anyone has a better idea, I’d love to hear from them.

This is the second half of the story, started in my last post, about making a rosette from spalted beech.

The next step was to cut the channels around the edge of the rosette to receive the border strips. Again, I used my jig mounted Dremel for this.

DSC_0014
DSC_0015

Here the channels have been cut and the decorative strips bent more or less to the right curvature on the bending iron ready for glueing in.

DSC_0016
DSC_0022

And here is the finished rosette, planed flush with the soundboard and given a wipe of shellac. I shan’t cut the soundhole until I’ve planed the soundboard down to it final thickness.

DSC_0026

A few weeks ago, I bought a block of spalted beech from Mark Bennett and mentioned, in a previous post, that I hoped it would make some striking guitar rosettes. I’ve been trying out some ideas. Here’s the piece of wood that provided the starting point.

DSC_0001

Having decided which face looked most attractive, I set up the bandsaw for a fine cut and sawed two veneers at about 4mm thickness. Then I book-matched them to create a more or less symmetrical pattern, by gluing them onto thin (1/64 inch) plywood for stability. Actually, there’s a bit more to it than that. First, using weak hot hide glue, I stuck a sheet of paper to a 6 by 6 inch square of 6mm MDF. Then I stuck a similar sized square of 1/64 inch thick plywood over that, again using thin hide glue, and weighted it down until the glue was dry. This provided the base onto which the veneers were glued.

DSC_0004

Using a Dremel mounted in a jig (details of jig available here) I cut out the rosette making the depth of cut just through the layer of thin plywood. It was then possible to remove the rosette using a thin blade – an ordinary knife from the dinner table works well – sliding it between the plywood and MDF layers in the plane of cleavage provided by the paper. Any paper or glue remaining on the underside of the rosette can easily be cleaned off with a hot damp cloth, which of course was the reason for using hide glue in the first place.

DSC_0007

I missed the opportunity to photograph either the detached rosette or the routed channel in the soundboard but below you can see the rosette being glued into position on the soundboard, weighted down so that it dries flat.

DSC_0010

Making guitars means that there are often offcuts of attractively figured wood left over. One thing to do with them is to turn them into musical boxes. As well as making amusing presents, they demonstrate how even a tiny box and soundboard act to produce a surprisingly loud sound from a mechanism that, on its own, is whisper quiet.

The musical mechanism can be bought from novelty shops quite cheaply. A range of tunes is available of which two are shown below.

The mechanism is a steel comb whose teeth are tuned to a scale. Rotating the hand cranked drum causes the raised pimples on it to ‘ping’ notes as they first bend a tooth and then release it.

Held in the hand, turning the handle produces a tune so quiet as to be almost inaudible. But pressed against something that can itself vibrate – even a table top or a wooden box – the volume of sound is substantially increased.

If you go to the trouble of mounting the mechanism on a thin plate of spruce (I simply glue it with a little epoxy), the sound is really quite loud. Here’s one in a walnut box. The mechanism is mounted upside down beneath the top and hidden inside the box so that only the handle protrudes.

And two views of another, this time with four mechanisms each playing a different tune.

French polish isn’t the most hard-wearing finish for a guitar and it’s time consuming to apply. But it does have at least three enormous advantages. The first is that, in spite of the repetitive nature of the process, it’s remarkably enjoyable to do. The second is that you don’t need any kit: no spraygun, no mask, no nasty solvents – just a pad and a bottle of shellac. And the third is the fact that, if it does get damaged, it’s fairly easy to repair.

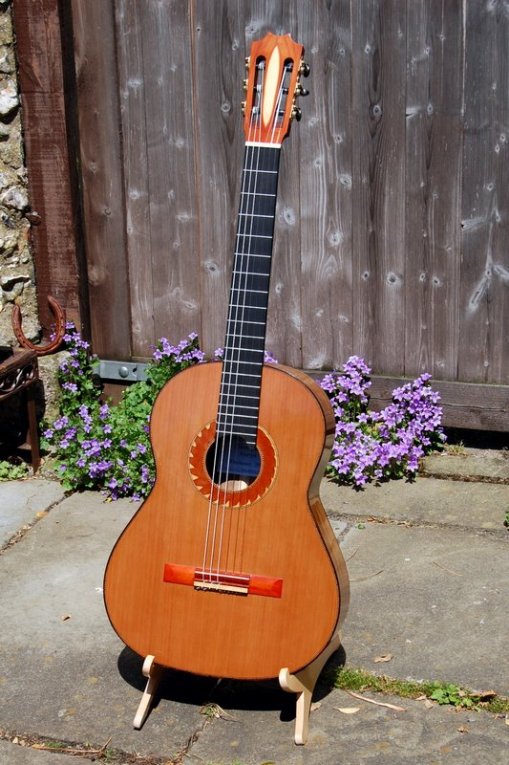
A cedar top classical guitar that I made a year or so ago got damaged the other day when it was treated like a Stratocaster. A young friend of its owner, keen to show off his skills as a rock musician, strummed it using a pick. Unfortunately, he didn’t notice the marks he was making on the soundboard until there was a comet’s tail of scratches on the treble side below the soundhole.

After unstringing the guitar, I steamed out the deeper gashes where the pick had dented the fibres of the wood and then re-polished the top. It’s not quite as good as new because, if you get the light right and look closely, you can just make a out a faint ghost of the original scratch. I’m not quite sure why but perhaps, where the pick reached the surface of the wood, it exposed slightly lighter coloured wood beneath.

I stupidly neglected to photograph the instrument before I started work, but here it is re-finished, re-strung and enjoying the spring sun while the polish hardens off.

Here’s the soundboard with all the bracing glued into place. As you can see, I’ve used a conventional arrangement with 7 struts symmetrically arranged in the familiar fan system and 2 closing bars at their lower ends. Over the years, guitar makers have experimented with the geometry of the bracing pattern with asymmetries, wide squat bars, tall narrow bars, transverse bars under the bridge, openings in the transverse bar under the soundhole and endless other variations. Part of the reason, I suspect, is that it’s so easy to do. No new jigs or moulds to make; no new skills to learn. And it’s something to talk to clients about – a unique selling point. Maybe that is too cynical but I tend to agree with William Cumpiano and Jonathan Natelson who wrote in their classic Guitarmaking: Tradition and Technology that ‘…specific elements of brace design, in and of themselves, are not all that important’. I need to admit that I have used a lattice bracing system with cedar soundboards (as I did with the last guitar that I made, which is being finished at the moment). It works perfectly well but I’m not yet convinced that it’s a significant improvement. Anyway, whatever the pro’s and con’s of these different systems, the new guitar is entirely traditional in its bracing.

The great photographer, Henri Cartier-Bresson, is said never to have re-arranged a scene or cropped a negative. It was, I suppose, his entirely admirable desire to show things as they actually were rather than how they might have been. Of course, being French, he dressed it up in fancy language. “Il n’y a rien dans ce monde qui n’ait un moment decisif” was how he put it.

Why do I bore you with this? Well, because yesterday afternoon when I was about to take a photograph of the struts being glued onto the soundboard, I caught myself on the verge of tidying the bench before the shot. Why on earth did I think that was necessary? I’m not trying to write an article for one of those wood-working magazines where, if the pictures are anything to go by, projects seem to reach completion without a tool being removed from a rack or a shaving falling to the floor.

Anyway, I stopped myself just in time. Here is where I’ve got to with the guitar that I’m working on at the moment.

The soundboard is nice piece (well, actually two pieces, of course) of close-grained spruce from Le Bois de Lutherie, which I joined and thicknessed to about 3mm – producing lots of shavings, as you can see below.

Then, using a Dremel mini-router in a shop-made device, I cut a channel for the rosette that I wrote about in a previous post, a few days ago.

Here’s the top, cut roughly to shape with the rosette inlaid.

%d bloggers like this: