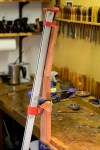
Before gluing up the joint, it’s worth taking some trouble to make sure that the two parts fit perfectly. I put the neck in a vise and hold the headstock in place while checking for gaps with a 0.05mm feeler gauge. A bright light behind the joint also helps to reveal places where the fit is defective.
Here I’ve discovered that the sides of the V are a bit loose…

…while the shoulders are tight.

A couple of fine shavings taken off the shoulders of the headstock using a shooting board…

…improves the fit. As a final check, I rub chalk over the male part of the V joint, locate the female part in position and press the joint together hard.

Where the fit is perfect, chalk will be transferred evenly. High spots, on the other hand, show up as a blotch of chalk surrounded by unchalked wood. Here it looks as if there’s a high point on one side near the mouth of the V.

A small file takes off the bump…

…and a second chalk fitting shows that the joint fits pretty well all over, except for a small low spot on one side at the apex of the V. I decide that I can live with that.

The next step is to dust off the chalk, size all mating surfaces of the joint with hot dilute hide glue and leave them to dry.

This is the clamping arrangement that I use. It’s important that the compression force runs through the centre line of the headstock and bears directly on the shoulders of the joint. Chiselling off the front of the V where it projects through the headstock allows the bar of the clamp to sit close to the surface of the headstock.

Once I’m happy that I can get the clamp into exactly the right position, I un-clamp, brush medium strength hide glue onto all joint surfaces, re-clamp it and leave it undisturbed for a couple of hours.

Here it is after taking the clamp off. The shadow below the right hand shoulder of the joint indicates that the headstock is slightly twisted relative to the neck. I suspected that this would happen while I was making the final adjustments but decided that the inaccuracy would be small enough to plane it out after the joint was glued up.

And I’m pleased to say that it was.

The back of the joint looks a bit weird until the extra block is shaved off.

But these two necks show that it comes out all right in the end. Even with a magnifying glass it’s scarcely possible to see that extra wood has been added and after the final shaping it will be quite invisible.

That’s the last of the series of posts on making a V joint. Thanks to anyone who has followed the story this far. Before finishing, I ought to add that there are many variations in the way this joint can be cut. Some makers, for example, prefer to use a template for marking out rather than a ruler and dividers. Please add a comment if you know how to do it quicker or better.
Click on the thumbnails below for larger pictures.


