Skip navigation

Monthly Archives: January 2012

Moving on from my previous post about marking out a V joint, it’s time to cut and trim it to shape.

First, I saw out the V in the headstock, keeping close to the lines but being careful not to saw past them. I try to be brave in sawing up to the line at the narrow end of the V because that’s the hardest part to clean up later.

Next, I stop to put a fresh edge on the chisel that I’m going to use. When it will slice through tissue paper, I reckon that it’s sharp enough.

I clean up the V, paring from both sides towards the middle. Final cuts are carried out with the chisel resting in the knife line that marked out the joint. A small square is useful to check that the sides of the V are flat. The most difficult part of the joint is the apex of the V but a slicing cut with the corner of the chisel will remove the last bit of waste.

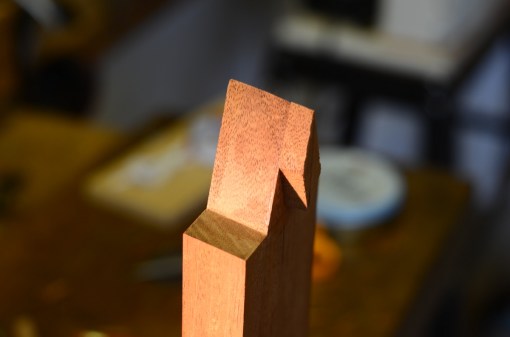
Here’s the female part of the V joint in the headstock finished. It shouldn’t be necessary to touch it again.

Now I cut the male part of the joint on the neck, starting with the angled shoulders. I chisel out a ramp for the saw in the usual way…

… and then saw down to the V, keeping clear of the lines.

I mark the starting point of the cuts for the sides of the V on the endgrain…

… place the neck in a vise, tilting it so that the cut will be vertical, and …

saw off the sides of the V with a tenon saw.

I mark and keep the pieces that I’ve just sawn off. They’ll be useful later.

Now I clean up the V and its shoulders with a chisel, paring in from both sides as I did for the headstock.

Here it is almost finished.

The neck and headstock are now tested for fit. Below is the view from the fingerboard side of the neck.

And here’s the view from the back of the neck.

As you can see, there’s a problem at the apex of the V, where a shadow shows that the neck isn’t quite deep enough to fill up the whole of the female part of the joint in the headstock. (My stock of mahogany for necks is planed up at a thickness of 25mm which means that I always run into this difficulty.)

The solution is to add a little extra depth at the apex of the V. This is where the offcuts that I saved come in handy. I prepare a small piece from one of these…

and glue it on, taking care that the direction of the grain in the extra piece is orientated in the same way as the grain of the neck.

When the glue is fully hard…

… it’s sawn roughly to shape…

… and trimmed with a chisel. This addition will be invisible in the completed joint.

The last step is to make sure that everything fits to perfection before glueing up. I’ll discuss how to do that in the next post.

Click on any of the thumbnails below for larger pictures.

Although the geometry of the V joint is simple, it’s surprisingly hard to to visualise if you’ve only seen the joint on a finished guitar. So, in an attempt to make the marking out easier to understand, I’ve sketched it below.

As with all joints, the more precisely it’s marked out the better the final result. It’s crucial that the stock is sized and squared up accurately. The headstock needs to be 17 or 18mm thick to give a final thickness of 19 or 20mm after application of the veneer. The neck must be rather thicker – at least 24 or 25mm – or there won’t be enough wood at the apex of the male part of the V where it engages with the female cut out part in the headstock. The side view in the drawings of the joint above will show what I’m getting at. (Even 25mm thickness may not be enough for full engagement but I’ll show how I deal with that problem in my next post.)

It’s also important that the end grain edge at the lower end of the headstock is exactly square to the sides and faces. I ensure this with a low angle plane and a shooting board.

To begin the marking out, I scribe a centre line down both faces of the headstock with a marking gauge, being careful to scribe both faces from the same edge.

Then I mark the corners of the V with dividers, placing points 18mm either side of the centre line to form the base of the V, and a single point 42mm up from the base on the centreline to define the apex. In the photograph, the pinpoints are marked with chalk to make them more visible.

A single bevel marking knife is used to mark the sides of the V, keeping the ruler on the outside of the V. I try not to cut beyond the point of the V, particularly on the back of the headstock. It doesn’t matter so much on the front which will be covered with veneer later.

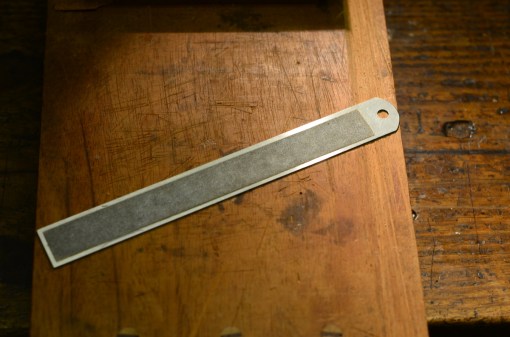
To ensure that the ruler doesn’t slip, it’s helpful to fix a strip of fine sandpaper to its underside with double-sided tape.

Here’s the V marked out on one face of the headstock. This process needs to be repeated on the other face so that both sides of the headstock are marked. I haven’t bothered to illustrate this.

Now it’s time to mark out the male part of the joint on the neck. Again, I start by scribing a centre line down both faces. Then I square a line across the upper face of the neck slightly more than 38mm from the end.

Using a sliding bevel set for the angle that I want the headstock to make with the neck (10º in this case, so the bevel is set to 80º) I scribe both sides of the neck from the line that I’ve just squared across it.

Then I square across the back of the neck at the point where the angled lines on the sides end. Finally, I mark out the V on both faces using dividers set to exactly the same dimensions that I used on the headstock. The only difference is that, when it comes to scribing the lines with the knife, I keep the ruler on the inside of the V.

Here’s the top of the neck marked out…

…and here’s the back. You can see that, on the back, the V is positioned slightly further down the neck than it is on the front.

In the next post, I’ll show how I cut out the joint.

You can see larger versions of the photographs by clicking on the thumbnails below.

There are two ways to create the angle between the headstock and the upper end of the neck of a guitar. One is to saw it out whole from a large piece of wood; the other is to make it out of two pieces using a glued joint – either the V shaped joint invented by the early guitar makers or a scarf joint. Of these options, the most rational is the scarf joint. It’s quicker and easier to execute than a V joint and wastes less wood than sawing out a neck and headstock whole. What’s more, it has a large glued surface so it doesn’t rely on nanometric accuracy for its strength.

Despite the obvious advantages of a scarf joint, the V joint has become something of a fetish among guitar makers. This is easy to defend where historical accuracy is concerned. After all, if you’re attempting a copy of a 19th century guitar, it’s desirable – even obligatory – to imitate the constructional methods of the original maker. But for a modern instrument, why prefer a weaker joint that takes longer to make?

The answer, I guess, is to show that you can. It’s not a million miles away from the Georgian cabinet makers who made the pins of their dovetails so skinny that they almost vanished at the narrow end, as you can see in this photograph of the drawer of the table at which I’m sitting as I write this post.

There’s no practical advantage either in strength or speed of production in cutting dovetails like this. Indeed, the reverse must be true. But they do provide an understated way by which makers can demonstrate that they care about seldom seen details and show off their skill.

I’ve found myself using a V joint for both these reasons. Here’s a copy of a 19th century guitar that I’ve mentioned in previous posts. The V joint in this instrument was present in the original and it seemed right to keep it.

On the other hand, the V joint in the guitar below could perfectly well have been a scarf joint. The guitarist for whom I made the instrument didn’t notice it until I drew it to her attention. Still, I enjoyed making it and, for reasons that I can’t properly explain, felt that it was worth the extra time and trouble.

I’ve just cut a couple more V joints for guitars that I’ve got planned for 2012 and, although instructions for making this joint already exist (see here, for example), I thought it might be useful if I kept a camera handy to document the process. In the next post, I’ll explain how I mark out the joint.

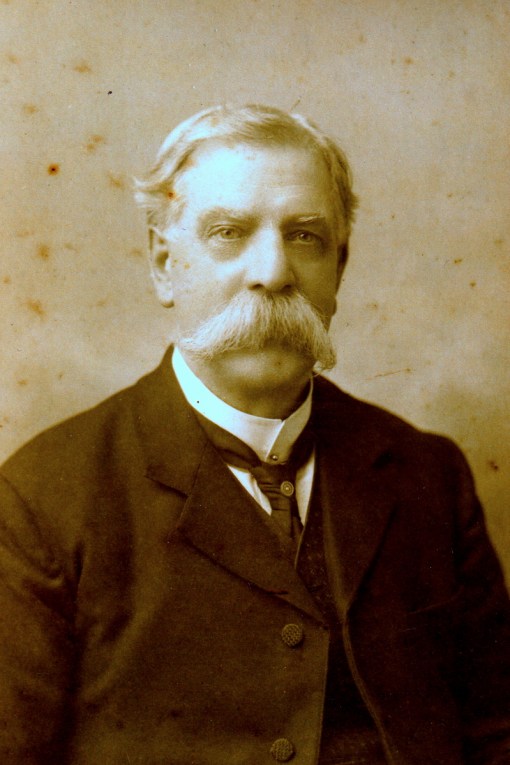
The chap in the photograph below, sporting a magnificent walrus moustache, was my great-great-grandfather. I don’t know exactly when he was born or when he died, but I do know that he worked as a cabinet maker in London and later in Plymouth during the second half of the 19th century.


Several pieces that he made are still in the family and among them is this decorative wall bracket. I’m not sure what it was meant for – probably a small clock or an ornament.


Quite apart from the pleasure of owning something made by a woodworking ancestor four generations earlier, I’ve always liked the bracket for its nicely judged proportions.


And I admire his neat solution to the problem of bringing everything to a point at the bottom of the bracket.


Needing a table for a narrow hallway a few years ago, I borrowed his design for a larger version in walnut.


Click on the thumbnails below if you’d like to see larger pictures.