Skip navigation

Tag Archives: rosette

All that remains at this stage is to cut the inner and outer circles to make the annulus of the rosette. I start by drilling a hole in the centre of the work piece…

… and then use a Dremmel mounted in a shop-made jig to cut the circles. (More details of the jig are available in the ‘Tools and Jigs’ section of this site.)

Here are the two rosettes that I’ve talked about in early posts in this series cut out.

And here are a few more. Going clockwise from top left, they’re made of English yew, laburnum, spalted beech, spalted crab apple and mulberry burr.

It’s probably best to leave them attached to their base until you’re ready to install them on the soundboard but, as you can see from the two rosettes at the bottom, I don’t always heed my own advice.

Advertisement

The rosette below is made from laburnum, arranged to show the striking contrast between the light coloured sapwood and the dark heartwood. It’s rather more complicated to make than the spalted beech rosette shown in the previous post and a fair degree of accuracy is needed throughout.

The starting point is a small piece of laburnum. This one has been air drying for a couple of years and I reckon that it should be pretty stable by now. I’ve scraped off the wax that covered the endgrain while it was drying.

The first step is to decide how many individual sector shaped pieces to use to complete the circle. I’m planning to use 20 for this rosette, which means that the sides of the billet must be planed to converge at an angle of 18°. That’s hard to manage on the bench top and it’s worth making a cradle to hold the wood while you plane it to size and shape. Go slowly and carefully because it’s important not only that the angle is right but that there’s no taper along the length of the piece. In addition, the width must be right so that the line between the sap wood and the heart wood ends up where you want it to be in the finished rosette.

Having planed the wood to a near perfect prism, it’s sliced on the bandsaw.

The pieces are numbered as they come off, so that they can be put together again in consecutive order.

Here the rosette is being assembled ‘dry’.

It may be necessary to make some fine adjustments with a shooting board and a block plane.

Here, the first piece is being glued and clamped into position on its plywood base. The base has been marked out in pencil to aid positioning of the individual pieces.

As the pieces are glued into place, the rosette nears completion.

Cleaned up and levelled with a finely set block plane.

One of the rosettes is going to be a replica of the one used for the zebrano guitar that I made last year from this remarkable lump of spalted beech.

I used a bandsaw to cut 2 thin (3mm) slices …

… and trimmed and book matched them to create a symmetrical pattern.

A card with a rosette shaped cut out helps give an idea of what the finished rosette will look like.

I use veneer tape to keep the two pieces in registration while they are glued to the base that I described in the previous post.

Clamping up.

Out of the press and ready to be planed flat and cut into shape. The veneer tape comes off easily if a little hot water is brushed on.

The next post will be about the construction of a different sort of rosette.

Last July I wrote a couple of posts about making a guitar rosette from spalted beech. But I missed the opportunity to photograph some of the details of its construction and, since I’ve been making some similar rosettes recently, I thought it might be useful if I had a second attempt at explaining the method.

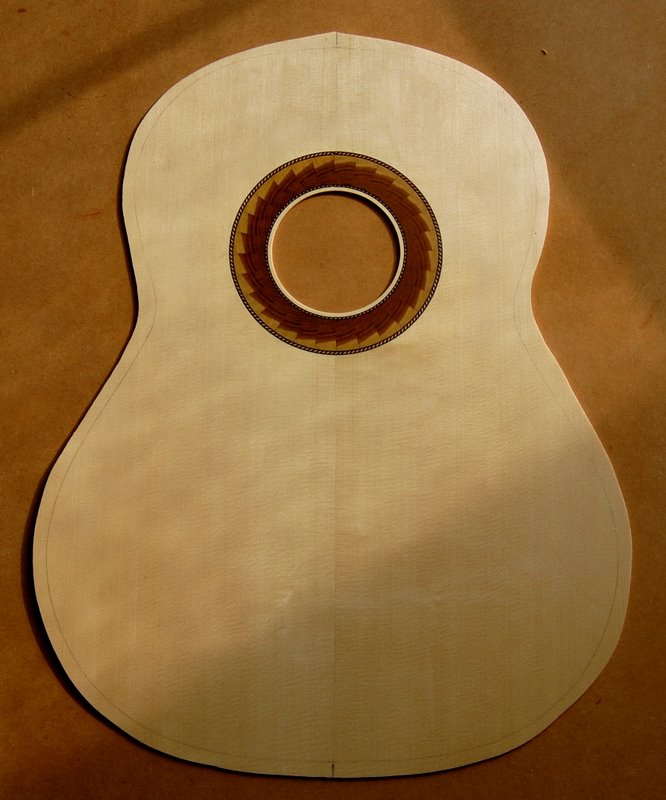
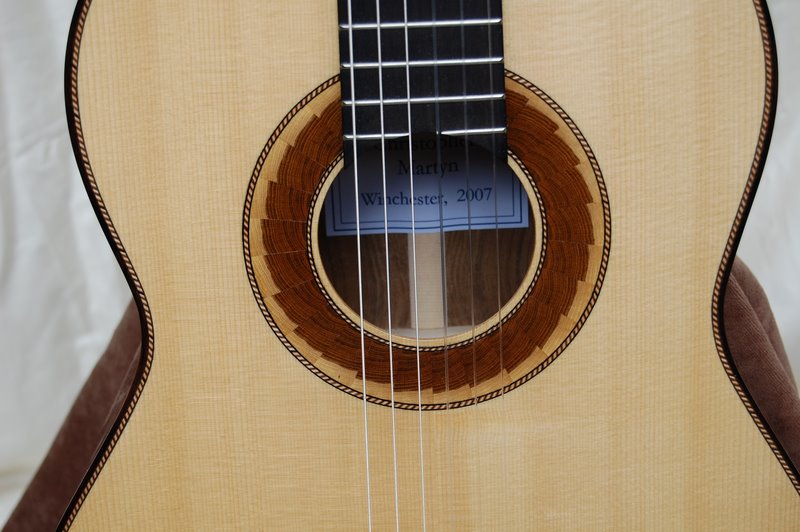
For reasons that I’ve discussed before, I like the visual effect of rosettes made by inlaying wood with contrasting colours or a striking figure and often use this technique when making guitars.

These rosettes are made from at least 2, and usually many more, individual pieces and I’ve found that it’s much easier to assemble them accurately on a base of thin birch plywood (0.4mm or 0.6mm thick*) than it is to inlay them directly on the soundboard. Because the plywood is so thin, it too needs a stable base during the assembly process. But, of course, it must be possible to remove this base when assembly is complete. I start with a square of 6mm MDF, a similarly sized sheet of clean paper and the square of  plywood that will be the permanent base of the rosette.

One surface of the square of MDF is given a thin coat of hot hide glue.

The sheet of paper is then smoothed down…

…before adding a second coat of glue…

Glueing up 3

and the layer of plywood.

The whole thing is then clamped up in a nipping press and left to dry overnight.

If you don’t have a press, a flat board and a weight work just as well.

The point of the paper and the hot hide glue is that, after it has been assembled, the rosette is easy to detach from the MDF base. In another post, I’ll show the next stages of the process.

*This sort of plywood is used by model makers and, at least in the UK, is easily available from the sort of shops that supply materials for people who build model aeroplanes.

This is the second half of the story, started in my last post, about making a rosette from spalted beech.

The next step was to cut the channels around the edge of the rosette to receive the border strips. Again, I used my jig mounted Dremel for this.

DSC_0014
DSC_0015

Here the channels have been cut and the decorative strips bent more or less to the right curvature on the bending iron ready for glueing in.

DSC_0016
DSC_0022

And here is the finished rosette, planed flush with the soundboard and given a wipe of shellac. I shan’t cut the soundhole until I’ve planed the soundboard down to it final thickness.

DSC_0026

A few weeks ago, I bought a block of spalted beech from Mark Bennett and mentioned, in a previous post, that I hoped it would make some striking guitar rosettes. I’ve been trying out some ideas. Here’s the piece of wood that provided the starting point.

DSC_0001

Having decided which face looked most attractive, I set up the bandsaw for a fine cut and sawed two veneers at about 4mm thickness. Then I book-matched them to create a more or less symmetrical pattern, by gluing them onto thin (1/64 inch) plywood for stability. Actually, there’s a bit more to it than that. First, using weak hot hide glue, I stuck a sheet of paper to a 6 by 6 inch square of 6mm MDF. Then I stuck a similar sized square of 1/64 inch thick plywood over that, again using thin hide glue, and weighted it down until the glue was dry. This provided the base onto which the veneers were glued.

DSC_0004

Using a Dremel mounted in a jig (details of jig available here) I cut out the rosette making the depth of cut just through the layer of thin plywood. It was then possible to remove the rosette using a thin blade – an ordinary knife from the dinner table works well – sliding it between the plywood and MDF layers in the plane of cleavage provided by the paper. Any paper or glue remaining on the underside of the rosette can easily be cleaned off with a hot damp cloth, which of course was the reason for using hide glue in the first place.

DSC_0007

I missed the opportunity to photograph either the detached rosette or the routed channel in the soundboard but below you can see the rosette being glued into position on the soundboard, weighted down so that it dries flat.

DSC_0010

Classic Hand Tools held a show at West Dean last weekend. It wasn’t a big event but I’m glad that I went for all sorts of reasons. One was the opportunity to meet Karl Holtey and to see and handle some of the planes that he makes. Another was to talk to Mark Bennett who, as always, had brought some amazing wood with him. With some difficulty, I succeeded in persuading him to part with this remarkable specimen of spalted beech.

DSC_0001

It’s not a big block (only about 5 inches by 5 inches by 6 inches) but the figure is exactly the right scale for instrument making. My first thought was  that it would make striking rosettes for guitars and I’ve been playing around with designs (using photocopies so as not to waste any of the material). Here’s one idea:

DSC_0007

A few weeks ago, I mentioned that I had started making a classical guitar with slightly smaller dimensions than usual. I hadn’t got anything radical or particularly innovative in mind but I hoped that, by reducing the diameter of the lower bout, decreasing the depth of the ribs and using a scale length of 640mm, the instrument would be easier and more comfortable for a smaller person to play. The fingerboard and string spacing were also to be narrower by a few millimeters to suit someone with small hands, and the guitar was to be as light as reasonably possible.

The instrument is now finished. The top is cedar with lattice bracing. The ribs and back are of English walnut with an unusual ‘watermark’ figure and the rosette and headstock were made using spalted beech that Mark Bennett, who runs a funiture making business called the Woodlark, sold me a while ago. The fingerboard and bridge are of Rio rosewood and the tuning machines were made by Keith Robson. The final weight, with strings and tuning machines in place, was just over 1400 grammes, which is significantly lighter than the weight of most of my instruments.

It has only been strung up for a day or two and it has yet to be played by a proper guitarist but my first impressions of the sound are good and the volume doesn’t seem to be perceptibly less than that of larger instruments. I’ll try to add a recording sometime but, in the meantime, here are a few photographs of the completed guitar.

dsc_0018

dsc_0016

dsc_0020 dsc_0019 dsc_00231 dsc_0005 dsc_0011

The soundboard is nice piece (well, actually two pieces, of course) of close-grained spruce from Le Bois de Lutherie, which I joined and thicknessed to about 3mm – producing lots of shavings, as you can see below.

Then, using a Dremel mini-router in a shop-made device, I cut a channel for the rosette that I wrote about in a previous post, a few days ago.

Here’s the top, cut roughly to shape with the rosette inlaid.

A few years ago, the gardener at Corpus Christi College, Oxford gave me some laburnum wood from a tree that he had had to take down. I cut it up and air dried it, and use it sometimes in guitar making. By preparing a sector shaped billet and slicing off thin cross sections, it’s possible to fashion a rosette that shows the contrast between the light sapwood and dark heart wood. It’s a more conventional design than Rick Micheletti’s wacky and imaginative rosette that I discussed in my last post, but the effect is quite attractive when inlaid into a top of Alpine spruce. Below are pictures of the rosette and the piece of laburnum from which the individual slices were cut. Obviously, the top has yet to be joined and the rosette inlaid. Those are the next tasks.

And here is guitar that I made last year, which has a rather similar rosette:

%d bloggers like this: