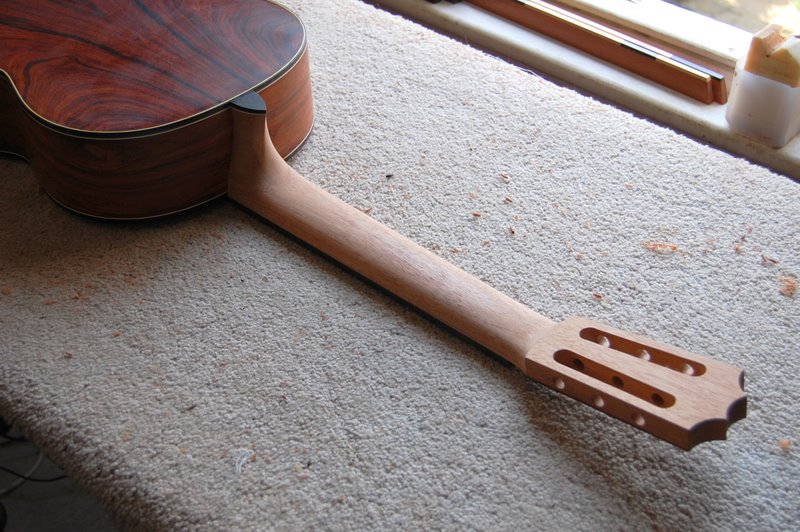
The fingerboard has now been fitted and fretted to a scale length of 650mm. I’ve more or less finalized the shape of the neck too. Time to make the bridge.

The fingerboard has now been fitted and fretted to a scale length of 650mm. I’ve more or less finalized the shape of the neck too. Time to make the bridge.
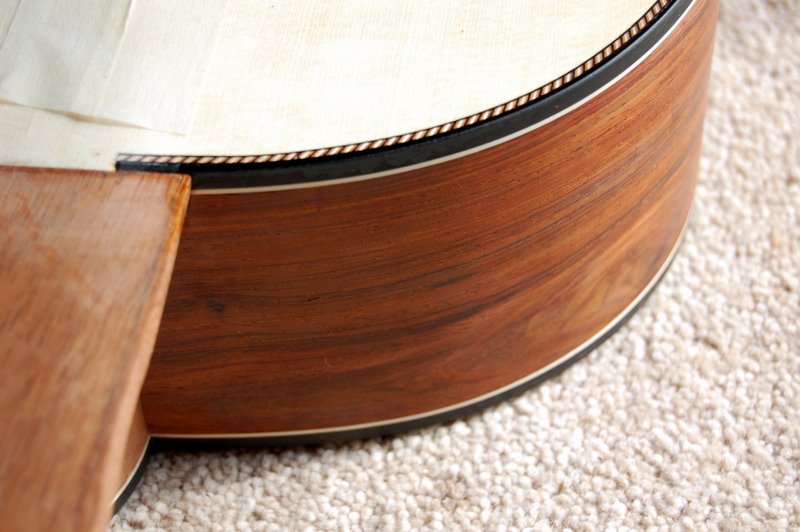
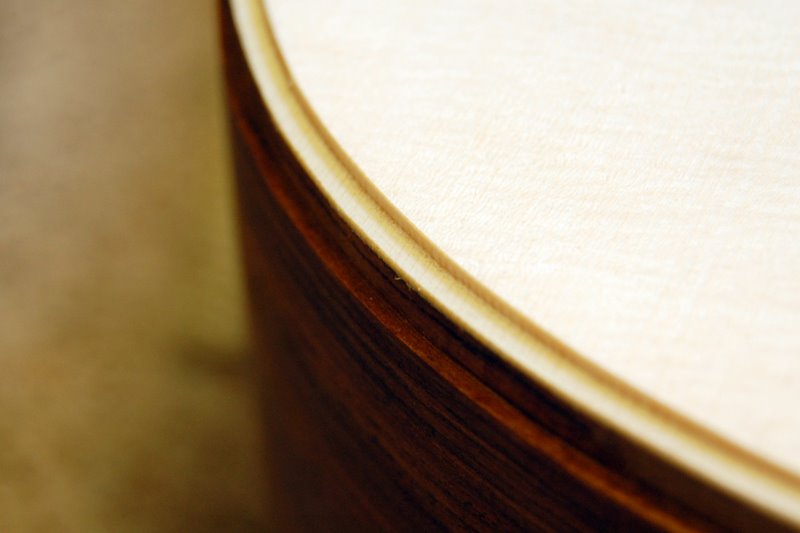
The binding and purfling went in quite neatly. It’s a simple scheme but I think it will look fine on the finished instrument. You can judge for yourself from the pictures. The apparent staining of the wood in some places is where I have brushed on some shellac to stop the white maple picking up dirt or, worse, turning an orange colour from contact with the cocobolo. It will disappear when the next coat of shellac goes on.
The next tasks are to prepare a fingerboard and make a bridge.

The binding is made from sawn veneers of ebony and maple. The photograph below shows a true edge being planed using a shooting board before using the bandsaw to slice off a narrow strip.

Here, a border of maple is being glued to the ebony in a shop-made clamping device.

Below is a strip of the finished binding, bent and ready to be glued into the ledge already routed on the guitar.

Now that the repair that I wrote about in my last post is complete, it’s time to get back to the guitar that I’m currently making. I’ve routed the ledges for the binding and purfling to sit in – a job that I never approach without trepidation since it’s so easy to ruin weeks of work by a moment’s inattention when you’re using a tool whose cutter revolves 25,000 times a minute. Fortunately, there were no mishaps. I never much like using an electric router – nasty, noisy, top-heavy things. But the next task of preparing and bending the binding strips will be easier to enjoy.

French polish isn’t the most hard-wearing finish for a guitar and it’s time consuming to apply. But it does have at least three enormous advantages. The first is that, in spite of the repetitive nature of the process, it’s remarkably enjoyable to do. The second is that you don’t need any kit: no spraygun, no mask, no nasty solvents – just a pad and a bottle of shellac. And the third is the fact that, if it does get damaged, it’s fairly easy to repair.
A cedar top classical guitar that I made a year or so ago got damaged the other day when it was treated like a Stratocaster. A young friend of its owner, keen to show off his skills as a rock musician, strummed it using a pick. Unfortunately, he didn’t notice the marks he was making on the soundboard until there was a comet’s tail of scratches on the treble side below the soundhole.
After unstringing the guitar, I steamed out the deeper gashes where the pick had dented the fibres of the wood and then re-polished the top. It’s not quite as good as new because, if you get the light right and look closely, you can just make a out a faint ghost of the original scratch. I’m not quite sure why but perhaps, where the pick reached the surface of the wood, it exposed slightly lighter coloured wood beneath.
I stupidly neglected to photograph the instrument before I started work, but here it is re-finished, re-strung and enjoying the spring sun while the polish hardens off.

I’ve glued on the back, so the ‘box’ is closed and it’s looking pretty much like a guitar. The next task is the binding and purfling. The cocobolo of the back and ribs has a fine figure and I thought that the straightforward black and white (ebony and maple) scheme that I used for the last instrument would set it off nicely. As you can see , I’ve already made a start with the end block inlay.


The back has now had its three transverse braces fitted. It has been trimmed to shape and the linings of the ribs have been adjusted to receive it. So I’m all ready to close the box.


Well, this was the moment that I was trying to describe. First, the neck was glued to the soundboard. Then the tail block was positioned and glued, the ribs slid into place, and glued at the neck and the tail. Finally, the perimeter of the soundboard was attached with tentellones. Only a day’s work, but enough energy was added to the system (to continue my ridiculous metaphor from physics) to achieve a quantum leap.


Even if a guitar maker works away at a fairly steady rate, there are times when progress will be slow and times when the instrument makes a quantum leap. Cutting the soundhole in the top after inlaying the rosette always seems to me to be a quantum leap moment. Another, as I’ve mentioned before, is when you start to assemble the collection of oddly shaped pieces of wood into something that is recognizably a guitar. I’m looking forward to that moment later today. For now, it’s still a pile of oddly shaped pieces of wood:

Here’s the soundboard with all the bracing glued into place. As you can see, I’ve used a conventional arrangement with 7 struts symmetrically arranged in the familiar fan system and 2 closing bars at their lower ends. Over the years, guitar makers have experimented with the geometry of the bracing pattern with asymmetries, wide squat bars, tall narrow bars, transverse bars under the bridge, openings in the transverse bar under the soundhole and endless other variations. Part of the reason, I suspect, is that it’s so easy to do. No new jigs or moulds to make; no new skills to learn. And it’s something to talk to clients about – a unique selling point. Maybe that is too cynical but I tend to agree with William Cumpiano and Jonathan Natelson who wrote in their classic Guitarmaking: Tradition and Technology that ‘…specific elements of brace design, in and of themselves, are not all that important’. I need to admit that I have used a lattice bracing system with cedar soundboards (as I did with the last guitar that I made, which is being finished at the moment). It works perfectly well but I’m not yet convinced that it’s a significant improvement. Anyway, whatever the pro’s and con’s of these different systems, the new guitar is entirely traditional in its bracing.

The great photographer, Henri Cartier-Bresson, is said never to have re-arranged a scene or cropped a negative. It was, I suppose, his entirely admirable desire to show things as they actually were rather than how they might have been. Of course, being French, he dressed it up in fancy language. “Il n’y a rien dans ce monde qui n’ait un moment decisif” was how he put it.
Why do I bore you with this? Well, because yesterday afternoon when I was about to take a photograph of the struts being glued onto the soundboard, I caught myself on the verge of tidying the bench before the shot. Why on earth did I think that was necessary? I’m not trying to write an article for one of those wood-working magazines where, if the pictures are anything to go by, projects seem to reach completion without a tool being removed from a rack or a shaving falling to the floor.
Anyway, I stopped myself just in time. Here is where I’ve got to with the guitar that I’m working on at the moment.

The soundboard is nice piece (well, actually two pieces, of course) of close-grained spruce from Le Bois de Lutherie, which I joined and thicknessed to about 3mm – producing lots of shavings, as you can see below.

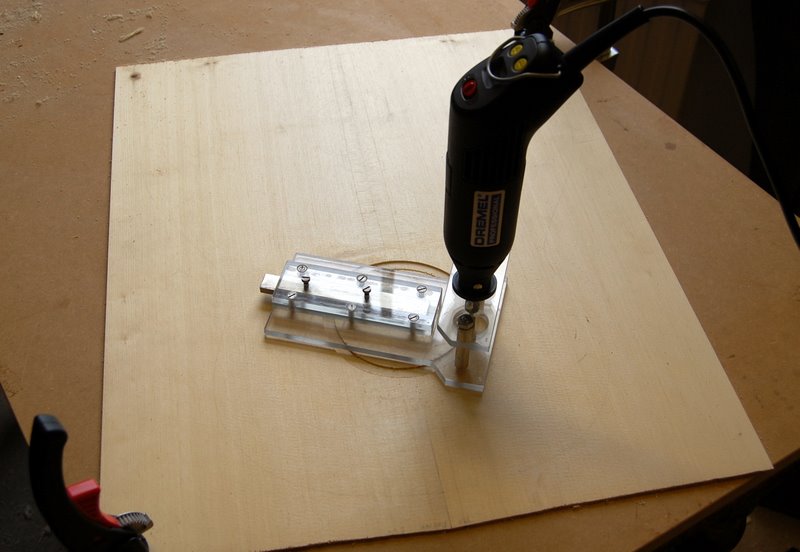
Then, using a Dremel mini-router in a shop-made device, I cut a channel for the rosette that I wrote about in a previous post, a few days ago.
Here’s the top, cut roughly to shape with the rosette inlaid.
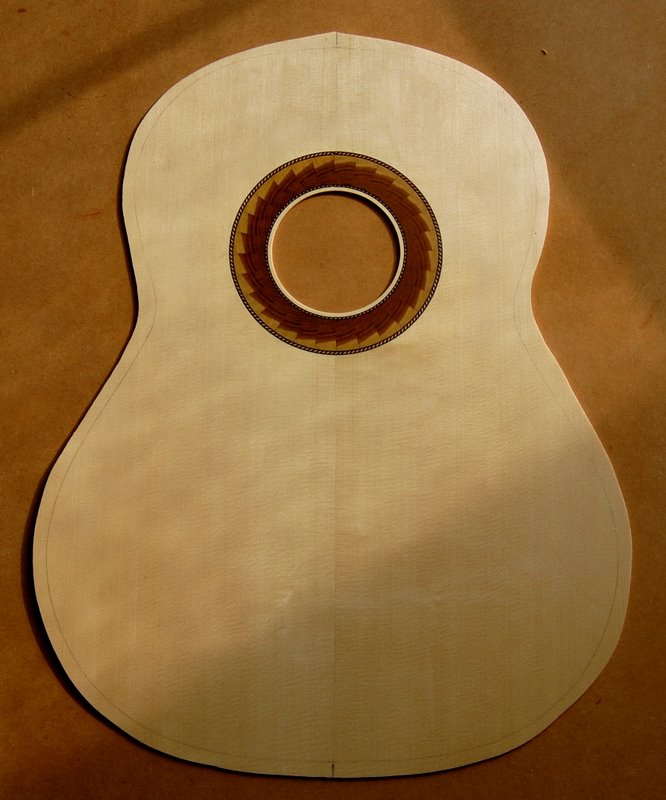
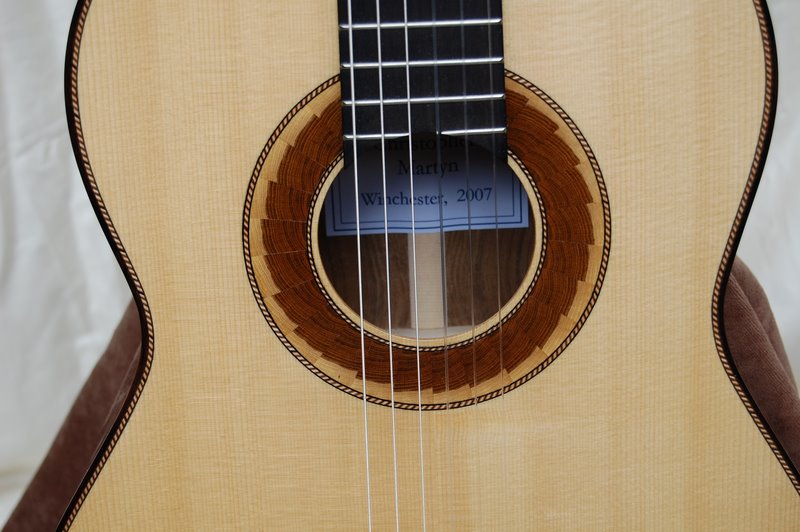
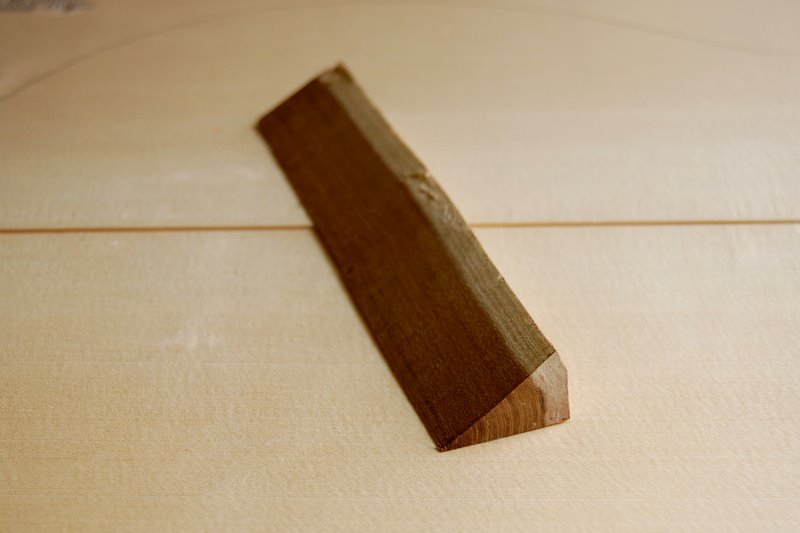
A few years ago, the gardener at Corpus Christi College, Oxford gave me some laburnum wood from a tree that he had had to take down. I cut it up and air dried it, and use it sometimes in guitar making. By preparing a sector shaped billet and slicing off thin cross sections, it’s possible to fashion a rosette that shows the contrast between the light sapwood and dark heart wood. It’s a more conventional design than Rick Micheletti’s wacky and imaginative rosette that I discussed in my last post, but the effect is quite attractive when inlaid into a top of Alpine spruce. Below are pictures of the rosette and the piece of laburnum from which the individual slices were cut. Obviously, the top has yet to be joined and the rosette inlaid. Those are the next tasks.

And here is guitar that I made last year, which has a rather similar rosette: