Watching varnish dry is a famously dreary activity. I’ve been passing the time thinking about ways of photographing the cello. Here’s one attempt.

Watching varnish dry is a famously dreary activity. I’ve been passing the time thinking about ways of photographing the cello. Here’s one attempt.
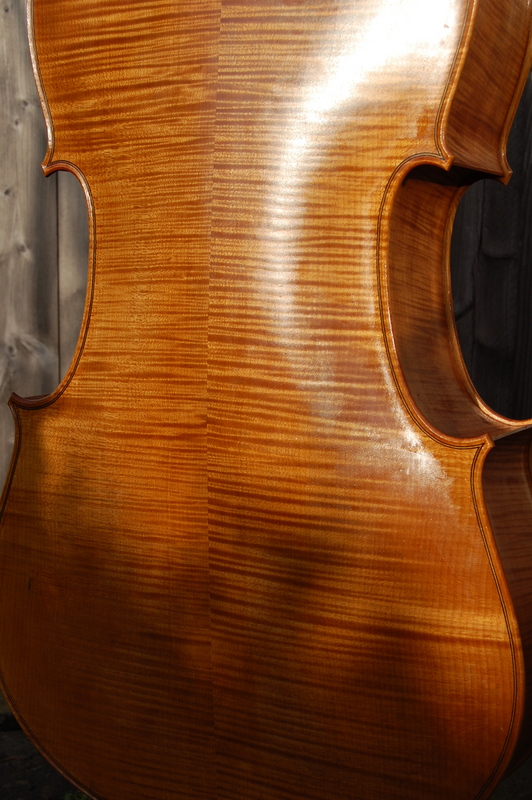
I’ve made a start on the varnishing, aiming at a warm honey colour for the finished instrument and trying to bring out the figure of the maple to its best advantage. At this time of year in England, there isn’t much sunlight and unless you have access to a drying cabinet, which I don’t, it’s necessary to leave a long time between coats. Still, it seems to be going fairly well, even if fairly slowly. The photographs below were taken outside on a rare sunny day. (Click on a thumbnail for a more detailed view.)


The cello is now finished, although not yet varnished. I made a short fingerboard and a tailpiece out of bird’s eye maple, turned an endpin out of boxwood to match the nut and saddle, fitted a baroque bridge and strung it up. It’s always an exciting moment when one first tries it out. Will it sound as good as one hopes or will it be a disappointment?
Fortunately, it has turned out well, producing a warm resonant tone with an even response across the strings. I’m no cellist, but the person I made it for has tried it and we’re both pleased with the sound that it makes. Almost inevitably, there’s a ‘wolf’ – on this cello it’s somewhere between f and f sharp on the 3rd string – but I don’t think it will prove to be a serious problem.
Of course, it was necessary to unstring the instrument to varnish it but, before I did so, I took a couple of photographs.


The front, like the back, is made from two book-matched pieces – but this time of spruce rather than maple. Here they are, joined and cut out and being roughly shaped.

The arching has been completed and the position of the f holes sketched in place.

The hollowing of the inside is now finished.

Blocks have been glued into place so that the bass bar can be fitted. They’re a temporary scaffolding and will be removed later.

The next stage of fitting the bass bar.

Below is a photograph of the front being glued onto the instrument.

The starting point for the back was two pieces of nicely figured book-matched maple.

I glued them together and cut out the outline roughly on the band saw. Then followed quite a lot of hard work, finalising the outline and establishing the arching – at first roughly with a gouge, but later smoothly and precisely with thumb planes and scrapers.

Here a channel has been cut for the purfling.

After hollowing the back to a thickness of around 6mm in the centre and 3.5mm at the edges, the weight of the plate had been reduced to 630 grams and the tap tone had fallen to somewhere between C and C sharp and I was ready to glue it to the rib and neck assembly completed earlier.

After the clamps have come off, it begins to look something like a cello.

