Skip navigation

Tag Archives: classical guitar

All that remains at this stage is to cut the inner and outer circles to make the annulus of the rosette. I start by drilling a hole in the centre of the work piece…

… and then use a Dremmel mounted in a shop-made jig to cut the circles. (More details of the jig are available in the ‘Tools and Jigs’ section of this site.)

Here are the two rosettes that I’ve talked about in early posts in this series cut out.

And here are a few more. Going clockwise from top left, they’re made of English yew, laburnum, spalted beech, spalted crab apple and mulberry burr.

It’s probably best to leave them attached to their base until you’re ready to install them on the soundboard but, as you can see from the two rosettes at the bottom, I don’t always heed my own advice.

One of the rosettes is going to be a replica of the one used for the zebrano guitar that I made last year from this remarkable lump of spalted beech.

I used a bandsaw to cut 2 thin (3mm) slices …

… and trimmed and book matched them to create a symmetrical pattern.

A card with a rosette shaped cut out helps give an idea of what the finished rosette will look like.

I use veneer tape to keep the two pieces in registration while they are glued to the base that I described in the previous post.

Clamping up.

Out of the press and ready to be planed flat and cut into shape. The veneer tape comes off easily if a little hot water is brushed on.

The next post will be about the construction of a different sort of rosette.

Last July I wrote a couple of posts about making a guitar rosette from spalted beech. But I missed the opportunity to photograph some of the details of its construction and, since I’ve been making some similar rosettes recently, I thought it might be useful if I had a second attempt at explaining the method.

For reasons that I’ve discussed before, I like the visual effect of rosettes made by inlaying wood with contrasting colours or a striking figure and often use this technique when making guitars.

These rosettes are made from at least 2, and usually many more, individual pieces and I’ve found that it’s much easier to assemble them accurately on a base of thin birch plywood (0.4mm or 0.6mm thick*) than it is to inlay them directly on the soundboard. Because the plywood is so thin, it too needs a stable base during the assembly process. But, of course, it must be possible to remove this base when assembly is complete. I start with a square of 6mm MDF, a similarly sized sheet of clean paper and the square of  plywood that will be the permanent base of the rosette.

One surface of the square of MDF is given a thin coat of hot hide glue.

The sheet of paper is then smoothed down…

…before adding a second coat of glue…

Glueing up 3

and the layer of plywood.

The whole thing is then clamped up in a nipping press and left to dry overnight.

If you don’t have a press, a flat board and a weight work just as well.

The point of the paper and the hot hide glue is that, after it has been assembled, the rosette is easy to detach from the MDF base. In another post, I’ll show the next stages of the process.

*This sort of plywood is used by model makers and, at least in the UK, is easily available from the sort of shops that supply materials for people who build model aeroplanes.

The zebrano guitar has now been collected by its new owner, Dave Crispin. He played it for a while before taking it away, and allowed me to capture a few minutes on a pocket recorder. The recording isn’t very good, I’m afraid, because the microphone is positioned much too far away from the instrument, but Dave has promised to come back for another session after he has had a chance to get used to  his new guitar and when I have worked out a better recording system. In the meantime, here’s a taste of the sound it makes.

Either click on the blue labels to download them to your own media player, or simply start the audio player in the bar.

Dave trying out his guitar for the first time

Dave improvising on the new guitar – with a bit of help from Jamie in the background

The guitar that I have been writing about in my last few posts is now, more or less, completed. It’s finished with French polish, which will benefit from a final burnishing in a couple of weeks time when it has got fully hard. But I couldn’t wait any longer to string it up and hear how it sounds. The back and ribs are zebrano and the soundboard is European spruce. The binding is Rio rosewood and maple, and the soundhole rosette and headstock veneer are spalted beech. I’m pleased with how it has worked out, though perhaps I got carried away when it came to the rosette, which might have been more elegant if the diameter had been a little less. Below are a few photographs of the completed instrument.

-0002

-0009

-0011

-0014

-0007

Last week I made a bridge for the guitar that I’m building at the moment. Here’s a photograph taken while it was being French polished. It’s in Rio rosewood and the tie block is inlaid with a strip of spalted beech to echo the rosette that I wrote about a little while ago.

DSC_0006

To cut the channel for the saddle and for the recess behind the tie block, I used this very simple router table. The idea came from an article in Fine Woodworking (No 182, February 2006) where Doug Stowe described how he made something rather similar for a full size router. There’s a brief description of his table here where there’s also a link to a full explanation and downloadable free plans.

DSC_0013

In my table, the Dremmel is mounted overhead on a cantilever. The table itself is a board of mdf. The adjustable fence is simply a straight strip of wood that pivots at one end and that is clamped at the other – an arrangement that allows a remarkable degree of precision. Depth of cut is controlled by the position of the router bit in the collet. The Dremmel isn’t powerful enough to cut slots to their full depth in one pass so, to avoid the fiddly business of repeatedly having to change the position of the router bit in its collet, I place a shim of 1.5mm thick plywood under the workpiece for each subsequent pass.

DSC_0012

The only bit about making the table that’s not straightforward is how to mount the Dremmel firmly and vertically in the cantilever in a way that allows removal. I solved the problem by buying a 3/4 inch diameter 12tpi tap, which matches the thread on the nose of the Dremel when the collar above the collet is removed. Then it was only a matter of drilling an undersized hole and tapping it out.

DSC_0007

The table is quick and easy to set up and it doesn’t take up much room in the cupboard when it’s not being used. It isn’t big enough to deal with anything very large, of course, but for making guitar bridges it works fine.

In Roy Courtnall’s book, Making Master Guitars, there’s an interview with José Romanillos in which he talked about some of techniques he uses. To attach the ribs to the foot of the neck, he prefers a wedged joint over the usual 2mm wide slot cut at the 12th fret line. Apparently, he got the idea from seeing such a joint in a 17th or 18th century French guitar. He gives some rudimentary instructions about how to make it:

‘You cut a wide tapering slot, then fit the rib tight up against the front end. Then you drive a wedge down, which matches the taper exactly. It is very strong.’

Well, I haven’t had any problems with strength of the joint when the ribs are housed in conventional narrow slots. But I’ve never found it easy to cut these slots to exactly the right width with a hand saw. If you want to do it with a single cut, you need to adjust the set of a back saw so that it cuts a kerf 2mm wide. Quite apart from the fact that it’s hard to do this without breaking the teeth, it makes the saw almost useless for any other purpose. The alternative is to do it by making two cuts. After the first cut, you can place a piece of plastic or plywood in the kerf to guide the saw for the second cut. But it’s not a very satisfactory solution because it’s too easy to cut into the plastic or wood and end up with a slot that’s too narrow near the bottom. You can get around that problem by substituting a sheet of metal, such as a cabinet scraper, but it doesn’t do the saw much good. Things get even more difficult if you want the slot to be 2.5 or 3.0mm wide to accommodate laminated ribs.

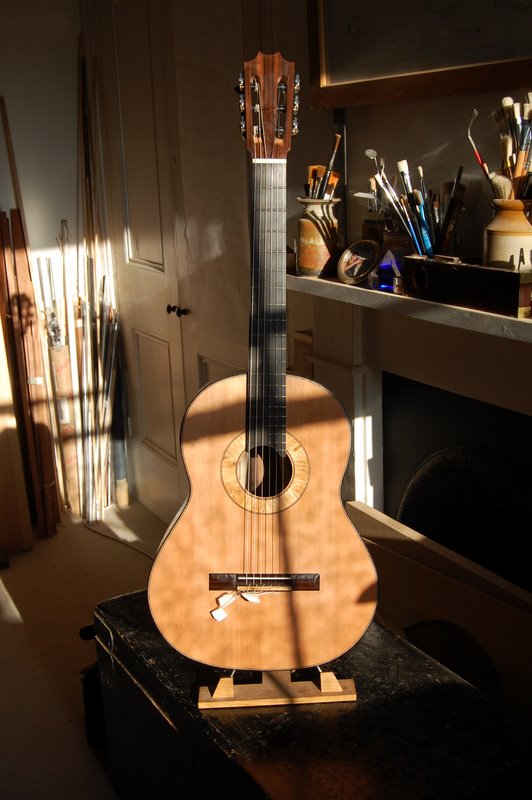
So I was interested to learn about Romanillos’ wedge technique and decided to try it out in the guitar that I’m making at the moment, which does have laminated ribs – zebrano lined with maple with a finished thickness of about 3mm.

The 2 photographs below show the wide tapering slots cut and chiselled out in the foot of the neck before the heel has been shaped.

DSC_0004

DSC_0003

Here, I’ve roughly shaped the heel and lower part of the neck.

DSC_0005

Then I cut the wedges and adjusted them to fit. Obviously, it’s particularly important that they draw everything up tight before the narrow end of the wedge reaches the soundboard end of the slot. I deliberately made them too long initially to give plenty of room for error.

DSC_0009

This is a dry run before gluing to make sure that everything fits perfectly. I discovered that another advantage of making the wedges too long at the beginning was that it provided something to grip when wriggling them out.

DSC_0014

And this is the finished joint, glued and cleaned up. As you can see, I’ve already started attaching the ribs to the soundboard with tentellones.

DSC_0018

Altogether, this turned out to be a useful experiment. The wide slot presented no problems to saw or chisel out. Indeed, it was significantly easier than cutting the conventional narrow slot. There’s a bit of extra time and trouble preparing the wedges but, as long as you have the right jig (see here) it’s not difficult. Gluing up was easy: plenty of room to coat all the surfaces before putting them together and sliding in the wedge. A couple of taps with a light hammer and it’s done. I’m fairly sure that I shall be using this technique again.

A while ago, I wrote about using a Millers Falls scraper plane to cope with some highly figured cocobolo that I was using for the back of a guitar. It’s an excellent tool for finalising the thickness and it leaves a clean finish even on the most awkward wood. The disadvantage however, is that it takes only the thinnest of shavings so if you’re starting with wood that’s way too thick, you’re in for a lot of time and effort to get to the right final dimensions.

Of course, the usual way to get around the problem is to run the wood through a drum sander. But I haven’t got one, partly because there isn’t room for it in my small workshop and partly because I’m allergic to sandpaper. I don’t mean it literally – I don’t come out in a rash if I touch the stuff – but I do think that there are nicer and quieter ways of shaping wood than grinding it into dust.

Another solution is to use a plane with a toothed blade. This won’t eliminate tear out completely but, should it happen, it’s limited and shallow and can easily be dealt with by a scraper later. Toothed blades work because the individual teeth are too small to grab enough fibres running in the wrong direction to rip out a large lump.

I use a No 4 Record bench plane fitted with a standard blade that I modified to look like this. Put the blade in the vice, cutting edge upward. Take a cold chisel and, against all your instincts, hammer a small gap into the cutting edge every 3 or 4 mm. Then sharpen the blade in the usual way.

DSC_0022

Another way of cutting the teeth is to use a thin grinding wheel in a Dremmel.

DSC_0007-1

Here are a couple of pictures of a guitar back in zebrano being thicknessed with the toothed blade. If you’ve ever used this wood, you’ll know that the interlocked grain structure makes it very hard to work. With a toothed blade and a wipe of wax on the bottom of the plane, the task becomes a pleasure.

DSC_0019

The marks left by the toothed blade are just visible running diagonally from bottom right to top left. And you can see the linguine-like shavings that are produced.

DSC_0017

Switching over to the scraper plane for final adjustment of the thickness and to remove the corrugations left by the toothed blade.

DSC_0029

This is the second half of the story, started in my last post, about making a rosette from spalted beech.

The next step was to cut the channels around the edge of the rosette to receive the border strips. Again, I used my jig mounted Dremel for this.

DSC_0014
DSC_0015

Here the channels have been cut and the decorative strips bent more or less to the right curvature on the bending iron ready for glueing in.

DSC_0016
DSC_0022

And here is the finished rosette, planed flush with the soundboard and given a wipe of shellac. I shan’t cut the soundhole until I’ve planed the soundboard down to it final thickness.

DSC_0026

A few weeks ago, I bought a block of spalted beech from Mark Bennett and mentioned, in a previous post, that I hoped it would make some striking guitar rosettes. I’ve been trying out some ideas. Here’s the piece of wood that provided the starting point.

DSC_0001

Having decided which face looked most attractive, I set up the bandsaw for a fine cut and sawed two veneers at about 4mm thickness. Then I book-matched them to create a more or less symmetrical pattern, by gluing them onto thin (1/64 inch) plywood for stability. Actually, there’s a bit more to it than that. First, using weak hot hide glue, I stuck a sheet of paper to a 6 by 6 inch square of 6mm MDF. Then I stuck a similar sized square of 1/64 inch thick plywood over that, again using thin hide glue, and weighted it down until the glue was dry. This provided the base onto which the veneers were glued.

DSC_0004

Using a Dremel mounted in a jig (details of jig available here) I cut out the rosette making the depth of cut just through the layer of thin plywood. It was then possible to remove the rosette using a thin blade – an ordinary knife from the dinner table works well – sliding it between the plywood and MDF layers in the plane of cleavage provided by the paper. Any paper or glue remaining on the underside of the rosette can easily be cleaned off with a hot damp cloth, which of course was the reason for using hide glue in the first place.

DSC_0007

I missed the opportunity to photograph either the detached rosette or the routed channel in the soundboard but below you can see the rosette being glued into position on the soundboard, weighted down so that it dries flat.

DSC_0010

Looking around for more on V-joints, I found Gary Demos’ site where he describes not only the construction of the joint but how he made a copy of a Panormo guitar. It’s a fine looking instrument and there are a few mp3 files that show that it sounds very good as well.

Cumpiano’s website has a brief discussion of the merits of the V-joint versus the scarf joint too. (You’ll need to scroll down a bit to find it.) I enjoyed his comment:

If you use a v-joint people will shower you with praises for your skill and those in the know will guess that you don’t have to make a living at making guitars.

There’s probably some truth in that. I’ve always admired Cumpiano’s down to earth approach to guitar making and his refusal to subscribe to anything that can’t be properly explained. See, for example, his courteous but uncompromising dismissal of the mystique of tap tone tuning.

Still, in the interests of historical accuracy, I’m going to pursue the V-joint a bit further. It seemed worth shaping the neck and headstock of my trial joint to get an idea of what it would look like on a finished instrument. In reality, it doesn’t look quite as good as the photographs suggest. At this resolution, glue lines, which in places are wider than they should be, don’t show up. But I’ve discovered two useful things: first, that the joint isn’t impossibly difficult to make and second, that it’s certainly strong enough.

DSC_0003

DSC_0004

Following on from my recent experiment with a small guitar, I’ve been thinking about going a stage further and making a copy of a 19th century guitar of the sort for which Panormo is famous. There’s one in the Edinburgh University collection of historic musical instruments and, rather helpfully, there’s a measured drawing available. The collection’s website has fierce warnings about all the content being copyright so I haven’t posted a photograph, but you can see the instrument by clicking here.

The neck of this guitar joins the head in a traditional V-joint. This isn’t a technique that I’ve ever used before so I’ve been trying it out, partly to get my hand in for making it and partly to reassure myself that the joint is stronger than it looks. There’s a good illustrated article on making V-joints on the Official Luthiers Forum, although you may have to register with the forum to get access. The geometry of the joint isn’t really very complicated but, on the other hand, it isn’t entirely straightforward either. The article explains it well.

The photograph below shows my rough first attempt being glued up. Hot hide glue is the correct stuff to use but, for this trial run, I substituted Titebond.

DSC_0001

Here it is with the clamps off.

DSC_0006

And after cleaning it up.

DSC_0008

And trying to break it.

DSC_0015

I wondered, in view of the endgrain gluing surfaces of the joint, whether the joint would be strong enough. So I played around, first by loading it with a 20kg weight and then by putting it in the vice and pulling on it as hard as I could. I couldn’t shift it and now feel entirely confident that it’s up to the job.

A few weeks ago, I mentioned that I had started making a classical guitar with slightly smaller dimensions than usual. I hadn’t got anything radical or particularly innovative in mind but I hoped that, by reducing the diameter of the lower bout, decreasing the depth of the ribs and using a scale length of 640mm, the instrument would be easier and more comfortable for a smaller person to play. The fingerboard and string spacing were also to be narrower by a few millimeters to suit someone with small hands, and the guitar was to be as light as reasonably possible.

The instrument is now finished. The top is cedar with lattice bracing. The ribs and back are of English walnut with an unusual ‘watermark’ figure and the rosette and headstock were made using spalted beech that Mark Bennett, who runs a funiture making business called the Woodlark, sold me a while ago. The fingerboard and bridge are of Rio rosewood and the tuning machines were made by Keith Robson. The final weight, with strings and tuning machines in place, was just over 1400 grammes, which is significantly lighter than the weight of most of my instruments.

It has only been strung up for a day or two and it has yet to be played by a proper guitarist but my first impressions of the sound are good and the volume doesn’t seem to be perceptibly less than that of larger instruments. I’ll try to add a recording sometime but, in the meantime, here are a few photographs of the completed guitar.

dsc_0018

dsc_0016

dsc_0020 dsc_0019 dsc_00231 dsc_0005 dsc_0011

A report from the UK last year complained that gender stereotyping influenced children’s choices about which musical instruments they took up. Girls get to play harps and flutes, while boys prefer trumpets and drums. I don’t know whether this is really right or that, even if it were, it would be a very terrible thing, but it certainly is true that more boys than girls play guitars. And while this might be gender politics, I can’t help wondering if the dimensions of the guitar have something to do with it too. The body of a concert guitar can be too big for many women to hold comfortably and I suspect that the usual measurements for the string spacing and fingerboard size are optimised for a male rather than a female hand.

I thought that it might be interesting to make a guitar with a slightly smaller body size than usual and combine it with a shorter scale length and narrower fingerboard. The idea is to make an instrument that a woman will find easy and responsive to play without compromising either the quality or the volume of the sound it produces.

The water-mark figure in this walnut is attractive but delicate and I think that it might work well for the back of a smaller guitar:

dsc_0003 dsc_0004

The front will be cedar and I’ve inlaid a rosette of spalted beech. I’ve carried the same theme through to the headstock veneer.

dsc_0001dsc_00081

So far in this blog, I’ve been writing about how instruments are made and showing photographs of what they look like. But what matters most, certainly to players and listeners but to makers too, is what they sound like. The trouble is that it’s not easy to make recordings that do justice either to player or instrument. Having made that excuse, I’m going to try. So here, as a first step, are three short pieces played by Fiona Harrison on this cedar top guitar that I’ve written about before. Click on the labels to hear them.

Piece 1

Piece 2

Piece 3