It’s always a pleasure to hear what one’s instruments are doing and I recently caught up with this small steel-string guitar that I made nearly 5 years ago for Poppy Smallwood. Based on a Martin OO model with 12 frets to neck, it’s made of English walnut and has a sitka spruce soundboard.
(More photographs here, if you want to know about its construction.)
Poppy has been playing the guitar in all sorts of places, making a reputation for herself as a singer and songwriter. Here she is performing one of her own songs for BalconyTV against the background of St Petersburg.
You can hear several more of her songs on Soundcloud.
It’s easy to understand why professional guitar players choose to play large powerful instruments. They need to be confident that they can fill a concert hall with sound.
But why do amateur players so often select instruments with the same characteristics? After all, they are mostly playing for their own pleasure, and mostly in their own homes. When they do play for others, the audience is usually small and loudness is rarely an issue.
I’ve often wondered whether they might do better to choose a smaller instrument with a shorter scale length. The loss of volume would be slight and probably more than compensated for by sweetness of tone. The shorter scale length would make fewer demands on the left hand and flatter their technique. For players with a smaller hand span, a shorter scale can extend their repertoire, bringing pieces with extreme stretches within reach. And, of course, small instruments have the advantages of being lighter to carry and taking up less room when put away.
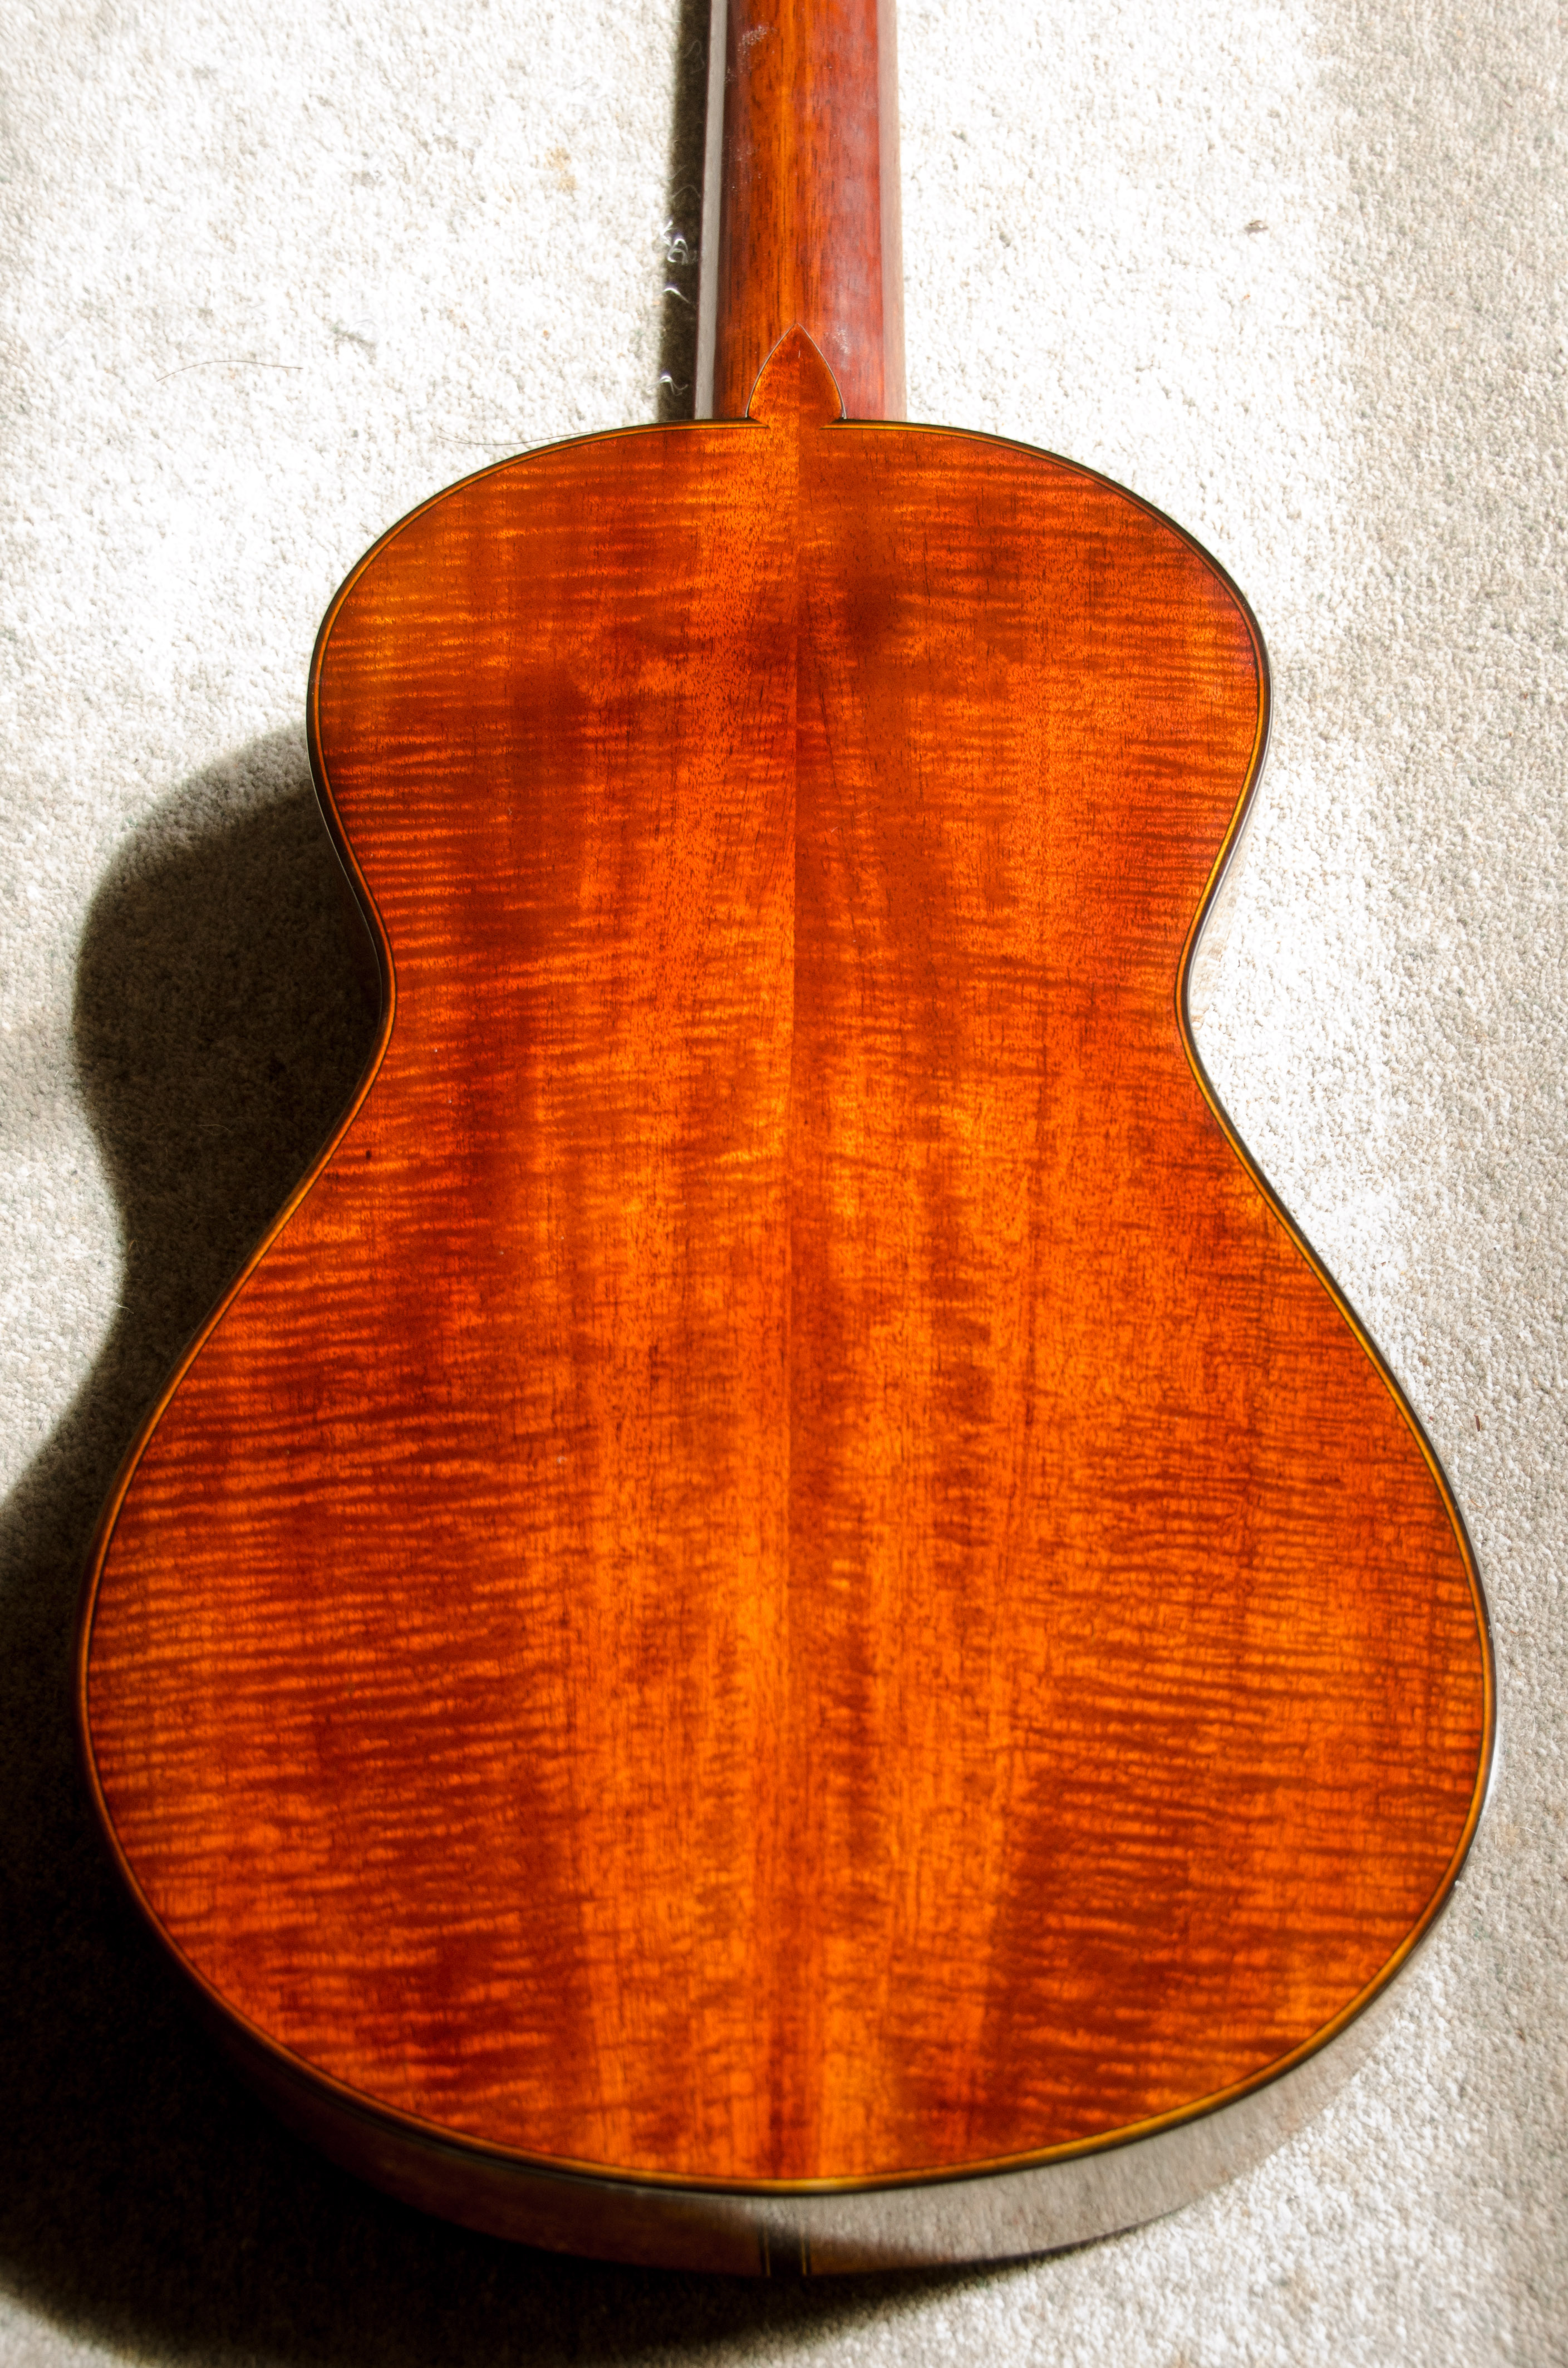
I’ve written about smaller instruments before but, apart from a single request from a client who wanted an instrument with a scale length of 630mm instead of the usual 650mm, never got much in the way of a response. Recently however, my patience was rewarded and I was delighted to be asked to make a small guitar. There are a few photographs of it below.
It’s much smaller than modern concert guitars with a body length of 425mm and a width across the lower bout of 283mm.(Typical figures for a concert guitar would be 490mm and 380mm.) It’s based on an instrument made by Antonio de Torres in 1888 for which workshop drawings are available in Roy Courtnall’s book Making Master Guitars. The soundboard is spruce and I used some old Brazilian mahogany with a striking fiddleback figure for the back and ribs. It’s finished with French polish.
It was commissioned by Gill Robinson, a professional artist and keen amateur guitarist, who was looking for an instrument that was light and easy to handle. Here she is trying it out.
Although I copied the shape and size and bracing pattern of the original guitar, I wasn’t trying to make a replica and I felt free to modify some details. The headstock is slotted to allow modern tuning machines, while Torres’ instrument used tapered wooden pegs. The scale length is slightly longer than the 604mm of the original at 613.5mm. This isn’t as arbitrary as it may seem, because 613.5mm gives the same open string length as a 650mm guitar with a capo at the first fret. I also used a 12 hole tie block for the bridge. Photographs of some of these details below:
Lars Hedelius-Strikkertsen is a Danish guitarist, who plays a 19th century guitar and specialises in the music of that time. Here he is playing a piece by Fernando Sor.
If you go to his website, you’ll see that he sometimes takes the trouble to dress the part when he gives concerts. Not surprisingly, in view of this attention to authentic period detail, he didn’t like the idea of using an anachronistic metal contraption as a capo d’astro and asked me to make him a cejilla.
I’ve written about these devices before so I won’t repeat myself. But the commission reminded me of what delightful instruments these early romantic guitars are. Anyone interested in finding out more about them might like to take a a look at this excellent online gallery.
There are two ways to create the angle between the headstock and the upper end of the neck of a guitar. One is to saw it out whole from a large piece of wood; the other is to make it out of two pieces using a glued joint – either the V shaped joint invented by the early guitar makers or a scarf joint. Of these options, the most rational is the scarf joint. It’s quicker and easier to execute than a V joint and wastes less wood than sawing out a neck and headstock whole. What’s more, it has a large glued surface so it doesn’t rely on nanometric accuracy for its strength.
Despite the obvious advantages of a scarf joint, the V joint has become something of a fetish among guitar makers. This is easy to defend where historical accuracy is concerned. After all, if you’re attempting a copy of a 19th century guitar, it’s desirable – even obligatory – to imitate the constructional methods of the original maker. But for a modern instrument, why prefer a weaker joint that takes longer to make?
The answer, I guess, is to show that you can. It’s not a million miles away from the Georgian cabinet makers who made the pins of their dovetails so skinny that they almost vanished at the narrow end, as you can see in this photograph of the drawer of the table at which I’m sitting as I write this post.
There’s no practical advantage either in strength or speed of production in cutting dovetails like this. Indeed, the reverse must be true. But they do provide an understated way by which makers can demonstrate that they care about seldom seen details and show off their skill.
I’ve found myself using a V joint for both these reasons. Here’s a copy of a 19th century guitar that I’ve mentioned in previous posts. The V joint in this instrument was present in the original and it seemed right to keep it.
On the other hand, the V joint in the guitar below could perfectly well have been a scarf joint. The guitarist for whom I made the instrument didn’t notice it until I drew it to her attention. Still, I enjoyed making it and, for reasons that I can’t properly explain, felt that it was worth the extra time and trouble.
I’ve just cut a couple more V joints for guitars that I’ve got planned for 2012 and, although instructions for making this joint already exist (see here, for example), I thought it might be useful if I kept a camera handy to document the process. In the next post, I’ll explain how I mark out the joint.
As you’ll have gathered from my last post, I’ve been making a steel string guitar recently. That’s something I hadn’t done for a long time, and it got me thinking about truss rods. One puzzle is how they got their name. Doesn’t the word truss conjure up something like the Forth bridge or the roof structure of this magnificent medieval tithe barn¹?
Wikipedia says that, used in an engineering context, a truss is a structure comprising one or more triangular units constructed with straight members whose ends are connected at joints referred to as nodes. So it’s surely an exaggeration to call a rod in the neck of a guitar a truss. Still, it’s not seriously misleading and I expect that most readers will think I’m quibbling.
Another puzzle surrounds the purpose they serve. As far as I know, no classical guitar maker finds them necessary. So why is it that steel string guitar makers never build a guitar without one? The straightforward answer is that steel strings exert more tension when tuned up to pitch than nylon strings and that a truss rod is necessary to counteract this extra force.
But I wondered if this explanation really held water. Using information provided by d’Addario, a reasonable estimate of the combined tension of 6 nylon guitar strings is about 40 kgs, while 6 steel strings exert nearly double that at 70kg. A load of 70 kgs certainly sounds a lot – the weight of an adult man – but don’t forget that it’s acting at a mechanical disadvantage when it comes to bending or breaking the neck of a guitar. The pull is only a few degrees away from parallel to the neck’s longitudinal axis and the compressive forces will be substantially greater than the bending forces.
Using simple beam theory, I made some rough calculations to get a sense of how much the string tension of a steel string guitar would bend the neck. These calculations didn’t attempt to take the taper of the neck into account – I simply pretended that the dimensions of the neck at the first fret remained constant all the way along the neck until it joined the body of the guitar – and they ignored the fact that the fingerboard and the neck are of different woods that have different material properties. (More details of the calculation are given at the end of this post in a footnote, if anyone is interested enough to check².)
The answer turned out to be that, tuned up to pitch, string tension would deflect the nut end of the neck about 1.6 mm forwards of its unloaded position. Although this is bound to be an over-estimate (because the calculation neglected the stiffening effect of the fingerboard and the increasing dimensions of the neck as it descends), I was surprised how large the deflection was. And I wondered if I’d got something seriously wrong. To check, I made a primitive model of a guitar neck to make some actual measurements. As you can see in the photographs below, the experimental neck is smaller in cross section than a real neck but it’s modelled realistically with an angled headstock and nut. Loaded with a 14lb weight, I measured a deflection of 1.47 mm at the nut, which compared fairly well with a theoretical value of 1.26mm derived using the dimensions of the model neck. So I’m moderately confident that my calculations for a real guitar neck aren’t too far out.
It looks as if the obvious answer is at least partly right. You almost certainly do need a truss rod to counteract the bending effect of string tension on the neck of a steel string guitar.
I suspect there’s another reason for truss rods too, and that is to prevent creep. Wood that bears a constant load for a long period tends to deform gradually even when the load is far short of its breaking strain. This is the reason why the ridges of old roofs tend to sag in the middle. In his book, Structures, J E Gordon explains that it’s also the reason why the Ancient Greeks took the wheels off their chariots at night. The wheels were lightly built with only 4 spokes and a thin wooden rim. If left standing still for too long, the wheels became elliptical in shape.
So perhaps I’ve ended up proving something that most guitar makers knew already. However, I don’t feel that the exercise has been a complete waste of time. Musical instruments shouldn’t contain anything that isn’t either necessary or beautiful. Since truss rods certainly don’t fit into the latter category, it’s good to know that they qualify for the former.
Footnotes
1. Thanks to Kirsty Hall for the image of the tithe barn.
2. Details of calculation of neck deflection.
Neck: width = 44mm; depth = 21.5mm; length (to 14th fret) = 355mm
Force exerted by string tension = 700 N
Nut taken as being 8mm above centroid of neck
To work out the area moment of inertia, I assumed that the neck was semi-elliptical in cross section and that the neutral axis ran through the centroid.
Modulus of elasticity of the neck was taken as 10,000 MPa.
Deflection was calculated as Ml²/2EI, where M = moment exerted by strings at the nut, l = length of neck to neck/body join, E = modulus of elasticity of material of neck (taken as 10,000 Mpa) and I = area moment of inertia of neck (assumed to be a half ellipse).
This tool, designed and made by Brian Hart, is a purfling marker. As violin makers will know, when moved around the edge of a violin plate, it marks closely spaced parallel lines a few millimetres inside the perimeter to guide the subsequent cutting and chiselling-out of the narrow channel into which the purfling is laid.
If necessary, the distance between the lines can be altered by placing shims between the marking blades and there’s a screw mechanism to change the offset of the blades and allow precise adjustment of the distance of the purfling channel from the edge of the plate. A feature of the design is that the handle and centre of gravity are below the marking blades. I find that this makes it easier to use than the usual design of purfling marker, which has the handle on top.
Here’s the corner of a cello where the purfling was marked out using this tool.
But of course it only works where there’s an edge. It’s no use if you want to imitate the Brescian makers and create an elaborate pattern of the sort seen on the violin below.
(I’m grateful to Andrew Sutherland, a violin maker and restorer in Lincoln, for providing this photograph and information about the violin. It was made in Dresden, Germany around 1870. Andrew reckons that the ornamentation was done by a purfling specialist in the workshop where the instrument was made after it had been completed and varnished. There are more photographs here.)
A possible solution occurred to me when I read Jeff Peachey’s description of how he sharpened the tips of a pair of jeweller’s forceps to make a tool to cut thin strips of tissue for book restoration. I wondered if the same idea could be adapted to make a freehand purfling marker.
Here I’ve re-shaped the tips of a pair of stainless steel forceps using a slip stone to create bevels on the inner faces, and drilled and tapped a hole for a small machine screw.
With the addition of a fold of brass shim stock between the blades, the width of the gap between the tips of the forceps can be adjusted precisely.
It works fairly well and can be used either freehand or to scribe around a template. I found it best to make one pass with the marker and then use a knife to deepen the cuts rather than trying to use the forceps to cut deeply. Here are some first experiments.
A little decoration goes a long way and not everyone believes that violins are improved by a double line of purfling and stylised floral motifs. On the whole, I think this ornamentation works better on cellos and viols than it does on smaller instruments. Still, there are times when a flourish is desirable – the fingerboards and tail pieces of baroque violins, for example – so my new purfling marker will probably be used occasionally.
The varnish on the cello has hardened up enough to allow it to be re-strung and I’ve posted a few photographs of the completed instrument below.
I’ve been adjusting the bridge and the soundpost to get the best sound out of the instrument and to try to minimise a wolf note that takes over between F and F# on the G and D strings. The wolf is less fierce now the instrument has been varnished than it was when it was in the white. But I really don’t know whether that’s a direct result of the varnish or whether it’s other changes that I’ve made, which include re-fitting the bridge and the soundpost and lengthening the tailgut. Although it’s between notes, the wolf is still fairly obvious and I think likely to cause a problem to a player, particularly in the first position on the D string.
Perhaps physicists understand wolf notes, but I’m doubtful that there’s much science in taming them. James Beament gives a partial, although not entirely satisfying, explantaion in his book The Violin Explained. Arthur Benade also discusses them in Fundamentals of Musical Acoustics but I found his account almost incomprehensible. I asked around for advice and got as many opinions as people I consulted. An experienced cello maker told me that I had probably thinned the top too far and that rather than trying to suppress the wolf, which would probably adversely affect the instrument’s performance, I should move the soundpost closer to the bridge and tell the cellist that they need to find a way of playing around it. By contrast, other cellists and makers told me the opposite: that many good cellos have a wolf note, that it’s not an indication of a badly made instrument or an overthinned top and that it’s usually possible to suppress the wolf without compromising the sound of the instrument.
Robin Aitchison and Sarah Mnatzaganian have written a helpful article, which is available on their website: Wolf Notes and How to Tame Them. And there’s a useful discussion in Strings magazine. However, I gradually realised that, for all the talk of tuning the tailpiece and absorbing the resonance at particular frequencies, there’s no coherent theory of wolf note suppression. It’s largely, if not entirely, a matter of trial and error. The fact there are so many types of wolf suppression devices available only reinforces this view. If any one of them worked consistently well, without any adverse effects on how the instrument sounded on other notes, it would surely dominate the market.
In the absence of a plausible theory, it seemed sensible to start with the simplest and most easily reversible of these devices – a small weight on the G or C string between the bridge and the tailpiece. David Bice at New Harmony makes a series of them, in different weights. The design is rather clever in that they stay on the string without the need for a rubber liner, thumbscrew and locknut of the conventional type of wolf note suppressor. It’s claimed that this method of mounting has less effect on the general sound of the cello. They’re reasonably priced at $16 each but they have to be obtained from the USA, which is a pain if you live in England, and, unless you ordered the full range of 6 and tried them all, how could you be sure that you’ve chosen the one with the optimum weight?
I decided to improvise something similar out of small rare earth magnets. They’re cheap, widely available, and I had some in the workshop because I sometimes use them as catches or holders for small tools. The ones that I had were 10mm in diameter, 3mm in thickness and each weighed about 2 grammes. Here’s a stack of them.(Actually, they’re so powerful that it’s hard to show them except as a stack.)
Using a Dremmel cut-off wheel and a slipstone, I ground a slot in 2 of them roughly the diameter of the C and G strings in width but leaving the depth just a touch on the shallow side.
In combination with a second magnet, the grooved magnet will clamp onto the string firmly enough to stay in place while the instrument is played – see below.
One obvious advantage of using magnets is that they’re easy to remove and re-position. Another is that by adding more magnets it’s possible to change the mass on the string and find the minimum required to suppress the wolf. After a surprisingly small amount of fiddling about, I discovered that positioning the magnets on the tail of the C string was significantly more effective than putting them on the G string. Two magnets there substantially suppressed the wolf and 4 abolished it altogether – without any discernible dampening effects on other notes.
The conclusion was that the cello needed about 8 grammes additional mass at this position on the C string. The magnets worked so well that I was tempted to leave it at that. But then I worried about their strength and the possibility that, if anything ferrous came into proximity, there might be a disaster. Perhaps better to replace them with something non-magnetic such as the brass ones made by New Harmony now that I knew the weight required.
In the end, however, I bought a Lup-X wolf note eliminator rather than one from New Harmony, just because I could get one from the UK immediately rather than bother with import duty and endure several days delay. They weigh 8 grammes (just what I needed) and are nicely made and straightforward to fit, screwing directly onto the string. This is what they look like:
After all this, you may be wondering how the instrument sounds. Here’s a cellist friend trying it out. The recording was made using nothing more sophisticated than a portable Roland Edirol R-09 recorder and, as you can hear from the background noises, coughs, and conversation, I’ve left it completely unedited.
It may be that I was lucky and my wolf was easy to tame. It’s entirely possible that the Lup-X is less effective on some instruments and, since I’ve only this one experience, I hesitate to recommend them. However, by using the magnet trick, it’s easy to find out whether it’s likely to work on your cello before buying one.
Patrick Gale, who commissioned the baroque cello that I completed earlier this year, spoke about why music was important to him in a recent broadcast on BBC Radio 3. If you missed his brief and amusing talk, you can listen to it here for the next few days.
A friend of mine, a writer by trade, but also a talented amateur musician, has asked me to make him a cello. He plays in a baroque ensemble and his current instrument, which has a modern set up and metal wound strings, doesn’t make the right sort of sound for music of that period.
Although I was delighted to be asked, I’d never made a baroque cello before and I needed to do some research before starting. It turns out that accurate information is hard to come by. Any number of books and websites will explain some of the differences between a baroque and a modern instruments: the lack of an end pin, the shallower neck angle, the broader and shorter fingerboard and the lower bridge. While this is all correct, it’s not detailed enough to be of much use to a would be maker. However, I’ve found out most of what I need to know through the generosity of an experienced professional cello maker who has made lots of instruments in the baroque style and who patiently explained what’s required. Thanks to his advice, I feel confident enough to make a start.
I’m going to re-use the three layer mould based on the Stradivari Forma B that I made for my last cello. Here are the corner blocks (willow) being glued into position.
And here they’ve been shaped, ready for the ribs to be glued in place.