Skip navigation

Category Archives: cello

Talking of Stradivari cellos (see previous post), I heard Julian Lloyd Webber play the Barjansky cello in a concert at the Theatre Royal, Winchester a couple of years ago. It was an unusual programme because apart from the music, which was wonderful, it included a question and answer session.

I asked Lloyd Webber why he didn’t sell his Strad and play one by a modern British maker. That would have two beneficial consequences, I suggested. First, it would help talented young cellists to understand that they could make good music even if they didn’t have a famous Cremonese instrument to play. Second, it would be a huge encouragement to modern violin and cello makers.

He responded to this potentially irritating question in a gracious way. He conceded that I had a point, but explained that he had been playing this particular cello for many years and that it had become so much a part of him as a musician that he couldn’t imagine being without it.

It was easy to see the force of that argument, but I didn’t want to let him off so lightly. So I followed up by asking whether, if he were to play the Barjansky and a modern cello behind a curtain, listeners would be able to tell the difference. While Lloyd Webber thought about this, the audience answered for him. ‘Oh yes,’ several people called out before he had a chance to speak.

I found this response both annoying and depressing. Annoying because it’s impossible to believe that any of the audience who seemed so certain about the superiority of the Strad had ever tested their belief in the sort of experiment that I outlined. And depressing because it reminded me of the difficulty that modern makers have in obtaining recognition of the quality of their instruments.

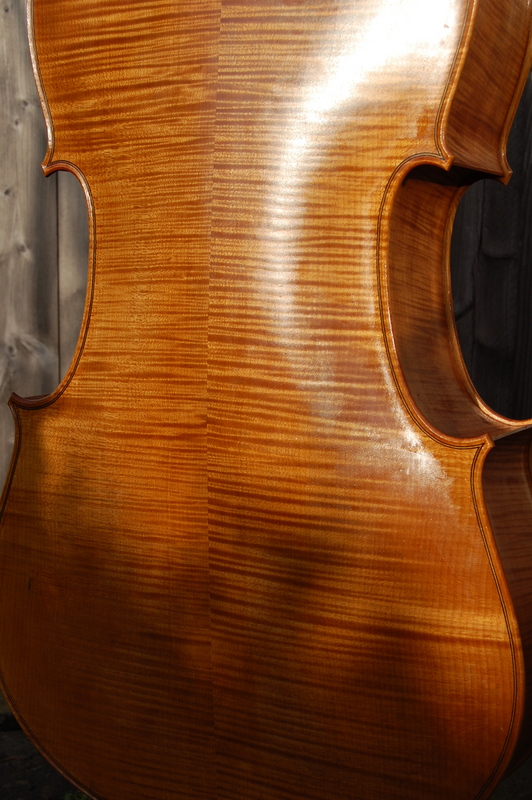
To challenge people’s assumptions about what makes a stringed instrument sound good, I made this trapezoidal fiddle. As you can see from the photographs, it bears little resemblance to the great instruments made in Italy in the 17th and 18th centuries. In fact, it’s a copy of an experimental violin invented by the french physicist Félix Savart around 1820. Heron Allen mentions it in Violin-Making: as it was and is. Rather more usefully, there’s a fairly recent book about its construction by Ronald Roberts (Making a simple Violin and Viola ISBN 0 7153 6964 4) which contains plans and a full set of measurements.


DSC_0575

DSC_0559

DSC_0566


Several violin players have been amused and interested enough to try it out and have been surprised by how well it sounds. I’ve been meaning to make a decent recording of it being played so that others can judge, but never quite got around to it. However, the other day I took it to my friend Tim Richards, who is a bowmaker in Frome. Tim says that he hardly plays these days, but I persuaded him to try it out in his workshop. As he did so, I switched on my Edirol recorder and captured a few snippets. Beyond normalising the levels, I’ve hardly done any editing and you’ll have to put up with some background noise and a bit of conversation.


P1010768


Now I’m not claiming for a moment that the sound made by this Savart violin is the equal of a fine traditional instrument, although I’ve heard many ‘proper’ violins that sound far worse. Nor am I saying that violin makers are wasting their time by paying so much attention to plate thicknessing, plate tuning and arching, although the fact that a flat-topped box-fiddle produces such a violin-like sound does make one wonder whether these things are as important as generally thought. What I am suggesting is that, before offering the opinion that old is better than new or that violins made by Stradivari or Guarneri sound better than those made today, it might be a good idea to ask ourselves if there’s any evidence to justify this view or whether we’re simply repeating a hoary old myth.

Of course reliable evidence is hard to come by. This page on Wikipedia mentions some of the attempts to evaluate the sound quality of different violins, although many are flawed in their experimental design. If you’d like to try for yourself, click here to compare a brief passage from the Tchaikovsky violin concerto played on Stradivari violin with the same passage played on a modern instrument. But don’t congratulate yourself too heartily if you get it right; tossing a coin would give the correct result 50% of the time.

In a recent and much better experiment, experienced players were asked to compare several different violins, including 2 made by Stradivari, 1 by Guarneri del Gesu and 3 by modern makers. The players wore welder’s goggles and tested the instruments in a darkened room so that they couldn’t be influenced by the visual appearance of the violins that they were playing. There’s a detailed account of the methods and results in The Proceedings of the National Academy of Sciences, available here. If you don’t have the stamina to wade through a scientific paper, here’s how the investigators summarised their findings:

We asked 21 experienced violinists to compare violins by Stradivari and Guarneri del Gesu with high-quality new instruments. The resulting preferences were based on the violinists’ individual experiences of playing the instruments under double-blind conditions in a room with relatively dry acoustics. We found that (i) the most-preferred violin was new; (ii) the least-preferred was by Stradivari; (iii) there was scant correlation between an instrument’s age and monetary value and its perceived quality; and (iv) most players seemed unable to tell whether their most-preferred instrument was new or old.

They go on to say, “These results present a striking challenge to conventional wisdom”. I couldn’t agree more.


Click on thumbnails below for larger images.

Several years ago, while  trying to photograph a baroque cello that I had just completed, I hit on a way of accenting the curves of the scroll and pegbox by using a dark background and a couple of angled light sources.  I was rather pleased  with this discovery and took a series of photographs, a couple of which you can see below.

DSC_0002

DSC_0006


But I was even more pleased when the cellist Steven Isserlis and the art director of Hyperion Records wanted to use one of these photographs for the cover of his recent recording of the Beethoven cello sonatas. The CD isn’t due for release until January 2014, but you can hear excepts here. I’d like to be able to add that Isserlis is playing the cello on the cover, but in fact he’s playing the Marquis de Corberon Stradivarius of 1726, on loan from the Royal Academy of Music.


Cello scroll-001

The British Violin Making Association held its annual Maker’s day on 3rd March in the Old Sessions House in Clerkenwell, London.

P1010334


It was noisy, crowded and hugely enjoyable. I only managed to take a few photographs, but I hope they’ll give a flavour of the day.


Andreas Pahler (in the maroon apron), who founded Alpentonholz, brought some fine tonewood to sell.

P1010336


More than 40 makers of violins, violas, cellos, viols and bows were showing their work.

P1010338


Christopher Jones, who plays in the Gildas Quartet, tries out a violin – one of mine, as it happens.

P1010332


Stephen Thompson displayed four beautiful violin and cello bows.

P1010329


Emma Alter, violist and bowmaker, plays a pochette made by Mike Lavelle, with one of her own baroque bows.

P1010340


Click on a thumbnail for larger views.

The varnish on the cello has hardened up enough to allow it to be re-strung and I’ve posted a few photographs of the completed instrument below.

I’ve been adjusting the bridge and the soundpost to get the best sound out of the instrument and to try to minimise a wolf note that takes over between F and F# on the G and D strings. The wolf is less fierce now the instrument has been varnished than it was when it was in the white. But I really don’t know whether that’s a direct result of the varnish or whether it’s other changes that I’ve made, which include re-fitting the bridge and the soundpost and lengthening the tailgut. Although it’s between notes, the wolf is still fairly obvious and I think likely to cause a problem to a player, particularly in the first position on the D string.

Perhaps physicists understand wolf notes, but I’m doubtful that there’s much science in taming them. James Beament gives a partial, although not entirely satisfying, explantaion in his book The Violin Explained. Arthur Benade also discusses them in Fundamentals of Musical Acoustics but I found his account almost incomprehensible. I asked around for advice and got as many opinions as people I consulted. An experienced cello maker told me that I had probably thinned the top too far and that rather than trying to suppress the wolf, which would probably adversely affect the instrument’s performance, I should move the soundpost closer to the bridge and tell the cellist that they need to find a way of playing around it. By contrast, other cellists and makers told me the opposite: that many good cellos have a wolf note, that it’s not an indication of a badly made instrument or an overthinned top and that it’s usually possible to suppress the wolf without compromising the sound of the instrument.

Robin Aitchison and Sarah Mnatzaganian have written a helpful article, which is available on their website: Wolf Notes and How to Tame Them. And there’s a useful discussion in Strings magazine. However, I gradually realised that, for all the talk of tuning the tailpiece and absorbing the resonance at particular frequencies, there’s no coherent theory of wolf note suppression. It’s largely, if not entirely, a matter of trial and error. The fact there are so many types of wolf suppression devices available only reinforces this view. If any one of them worked consistently well, without any adverse effects on how the instrument sounded on other notes, it would surely dominate the market.

In the absence of a plausible theory, it seemed sensible to start with the simplest and most easily reversible of these devices – a small weight on the G or C string between the bridge and the tailpiece. David Bice at New Harmony makes a series of them, in different weights. The design is rather clever in that they stay on the string without the need for a rubber liner, thumbscrew and locknut of the conventional type of wolf note suppressor. It’s claimed that this method of mounting has less effect on the general sound of the cello. They’re reasonably priced at $16 each but they have to be obtained from the USA, which is a pain if you live in England, and, unless you ordered the full range of 6 and tried them all, how could you be sure that you’ve chosen the one with the optimum weight?

I decided to improvise something similar out of small rare earth magnets. They’re cheap, widely available, and I had some in the workshop because I sometimes use them as catches or holders for small tools. The ones that I had were 10mm in diameter, 3mm in thickness and each weighed about 2 grammes. Here’s a stack of them.(Actually, they’re so powerful that it’s hard to show them except as a stack.)

Using a Dremmel cut-off wheel and a slipstone, I ground a slot in 2 of them roughly the diameter of the C and G strings in width but leaving the depth just a touch on the shallow side.

In combination with a second magnet, the grooved magnet will clamp onto the string firmly enough to stay in place while the instrument is played – see below.

One obvious advantage of using magnets is that they’re easy to remove and re-position. Another is that by adding more magnets it’s possible to change the mass on the string and find the minimum required to suppress the wolf. After a surprisingly small amount of fiddling about, I discovered that positioning the magnets on the tail of the C string was significantly more effective than putting them on the G string. Two magnets there substantially suppressed the wolf and 4 abolished it altogether – without any discernible dampening effects on other notes.

The conclusion was that the cello  needed about 8 grammes additional mass at this position on the C string. The magnets worked so well that I was tempted to leave it at that.  But then I worried about their strength and the possibility that, if anything ferrous came into proximity,  there might be a disaster. Perhaps better to replace them with something non-magnetic such as the brass ones made by New Harmony now that I knew the weight required.  

In the end, however, I bought a Lup-X wolf note eliminator rather than one from New Harmony, just because I could get one from the UK immediately rather than bother with import duty and endure several days delay. They weigh 8 grammes (just what I needed) and are nicely made and straightforward to fit, screwing directly onto the string. This is what they look like:

After all this, you may be wondering how the instrument sounds. Here’s a cellist friend trying it out. The recording was made using nothing more sophisticated than a portable Roland Edirol R-09 recorder and, as you can hear from the background noises, coughs, and conversation, I’ve left it completely unedited.

Cello trial.mp3

It may be that I was lucky and my wolf was easy to tame. It’s entirely possible that the Lup-X is less effective on some instruments and, since I’ve only this one experience, I hesitate to recommend them. However, by using the magnet trick, it’s easy to find out whether it’s likely to work on your cello before buying one.

The cello that I’ve been writing about over the past few months isn’t far off completion. I always string instruments up before varnishing to be sure that they sound as they should. If adjustments are necessary and the top needs to come off, it seems better to do it before any colour or varnish is applied. This one was played by several decent cellists and I’m glad to say they had no complaints about the sound – a good response across the strings, although there’s a rather fierce wolf between F and F# on the G string and, to a lesser extent, on the D string too. It may prove necessary to fit a wolf note suppressor but I’ll defer judgement on that until it has been strung up again after varnishing. One of the cellists however, was helpfully critical about the shape of the neck – he thought that I had left it a touch too wide. So I reshaped it before starting to varnish.

Here’s the instrument strung up in the white:

And here are a couple of photographs after a few coats of varnish.

My cello is making progress, even if rather slowly. I’ve just closed up the box, which is a step that requires a lot of clamps to hold everything in position while the glue sets.


And here’s the problem: where to find enough clamps. One solution is to buy or, cheaper, make spool clamps for the job. But these clamps are less than perfect because the force they exert operates at the edge of the plates rather than directly over the ribs. For clamps that put pressure in the right place, you have to buy a set of the dedicated cello clamps made by Herdim®, which, I’m told, are easy to use and work well. Unfortunately each of the Herdim® clamps costs about 15 Euros, so getting equipped with the 40 or so that are needed for a cello is quite expensive.

Partly out of meanness and partly because I enjoy making my own tools and jigs, I devised this alternative. The photographs make it fairly clear how the clamps are constructed and instructions are probably unnecessary. But perhaps a few details will be helpful. The clamping force is supplied by a wing-nut on 6mm studding. I made at least half of the clamping length out of aluminium tubing so that the clamps were as light as possible. It’s important that the aluminium tubing has an internal diameter only very slightly greater than the diameter of the studding so that the upper part of the clamp slides smoothly, but without play, over the lower part. The clamping pads are mahogany but, of course, any hardwood could be substituted. When making these pads, it’s a better idea to work a rebate into a length of cross grain mahogany and then saw it up than to craft each one individually. The pads are lined with cork that has been glued on in a profile that puts the pressure directly over the ribs. I used polyurethane glue to set the tubing into the clamping pads and to cement the studding into the aluminium tubing but I should think epoxy would work equally well.

The same principle also works for shorter clamps. The one below is designed for crack repairs. Shallow cleats are temporarily glued either side of the crack, which the jaws of this clamp can grip to close the gap.

At the Easter Instrument Making Course at West Dean this year, I had the pleasure of meeting Wouter Hilhorst, who was making a viola. Apart from admiring the precision and delicacy of his work, I was also interested to see that he had made his own planes, 2 of which were in the Japanese style. He let me take a quick photograph – see below.

We’ve recently had an email correspondence and he’s sent me some better photographs, and some details of how he made them. He gets the blades from the German company, Dick, and recommends their Japanese blades writing:

They are laminated and can be honed to a very sharp edge. As you probably know, blades for larger Japanese planes taper in thickness and wedge themselves in the more or less resilient oak plane bodies, which works surprisingly well. The small blades from Dick aren’t tapered in thickness, but only slightly in width. When I made them I thought I would wedge them widthwise, but the little recesses which grip the blade on both sides are enough, just by friction (although I had to glue two little strips of paper in the recesses of the smaller plane). The blade needs some space widthwise to be adjusted laterally.

He makes the planes from European oak or boxwood and chisels them out of a solid block. This is a technique that I intend to re-visit. All the planes that I’ve made recently followed the Krenov method in which you start by sawing two slices off the block to make the sides of the plane, shape the bed and throat from the middle section, and then glue it back together. There are some photographs of this method of construction here and here.


As you can see, I’m working on a cello at the moment. But I’ve written about cello making before and, rather than repeat myself, I thought that I’d show a few wooden constructions that have amused me recently.

First, an old favourite – but one that people who don’t know the secret find seriously puzzling – the captive screw. There a trick to its manufacture, of course, and, if you can’t work out how it’s done, this YouTube video explains.

Rather more sophisticated is this apparently impossible double dovetail. There’s no trick here and the joint comes apart with ease. It’s just that the geometry of the joinery isn’t what one assumes it to be at first sight. The joint is occasionally useful. Roy Underhill describes an application in his book, The Woodwright’s Guide (ISBN978-0-8078-5914-8), where it’s employed to join the front legs to the top of a work bench.

The triple dovetail below is an ingenious puzzle that I found in Edwin Wyatt’s book, Wonders in Wood (ISBN 0-941936-40-6). Wyatt says that it was invented by someone called A B Cutler and published in a magazine, Industrial Arts and Vocational Education in 1930. It has no practical application as far as I know. The geometry of the joint is a variation on that of the double dovetail but it’s rather harder to make. Again, despite all appearances, the two pieces come apart easily – as you can see if you compare the positions of the ebony dots in the two photographs.

In a future post, I’ll show some photographs of the joints pulled apart.

Patrick Gale, who commissioned the baroque cello that I completed earlier this year, spoke  about why music was important to him in a recent broadcast on  BBC Radio 3.  If you missed his  brief and amusing  talk,  you can listen to it  here for the next few days.

The varnish on the baroque cello eventually got hard enough to let me string up the instrument again and send it off to its new owner, Patrick Gale, who lives in Cornwall. Patrick is best known as a novelist but he’s a keen and talented musician too and I hope he will be pleased with cello and the sound it makes. He tells me that he taking part in a series of programmes on amateur music-making that will be broadcast on BBC Radio 3 later this year. Unfortunately, although he mentions this cello on the programme, he doesn’t get to play it.

Before parting with the cello, I took a few photographs. There are 3 below and more in Gallery.

dsc_0004

dsc_0011

dsc_0008-1

I’ve made a start on the varnishing, aiming at a warm honey colour for the finished instrument and trying to bring out the figure of the maple to its best advantage. At this time of year in England, there isn’t much sunlight and unless you have access to a drying cabinet, which I don’t, it’s necessary to leave a long time between coats. Still, it seems to be going fairly well, even if fairly slowly. The photographs below were taken outside on a rare sunny day. (Click on a thumbnail for a more detailed view.)

The cello is now finished, although not yet varnished. I made a short fingerboard and a tailpiece out of bird’s eye maple, turned an endpin out of boxwood to match the nut and saddle, fitted a baroque bridge and strung it up. It’s always an exciting moment when one first tries it out. Will it sound as good as one hopes or will it be a disappointment?

Fortunately, it has turned out well, producing a warm resonant tone with an even response across the strings. I’m no cellist, but the person I made it for has tried it and we’re both pleased with the sound that it makes. Almost inevitably, there’s a ‘wolf’ – on this cello it’s somewhere between f and f sharp on the 3rd string – but I don’t think it will prove to be a serious problem.

Of course, it was necessary to unstring the instrument to varnish it but, before I did so, I took a couple of photographs.

dsc_0002-41

dsc_0008-21

The front, like the back, is made from two book-matched pieces – but this time of spruce rather than maple. Here they are, joined and cut out and being roughly shaped.

dsc_0020-1

The arching has been completed and the position of the f holes sketched in place.

dsc_0005-2

The hollowing of the inside is now finished.

dsc_0007

Blocks have been glued into place so that the bass bar can be fitted. They’re a temporary scaffolding and will be removed later.

dsc_0009

The next stage of fitting the bass bar.

dsc_0010

Below is a photograph of the front being glued onto the instrument.

dsc_0023

The starting point for the back was two pieces of nicely figured book-matched maple.

dsc_0005

I glued them together and cut out the outline roughly on the band saw. Then followed quite a lot of hard work, finalising the outline and establishing the arching – at first roughly with a gouge, but later smoothly and precisely with thumb planes and scrapers.

dsc_0130

Here a channel has been cut for the purfling.

dsc_0131

After hollowing the back to a thickness of around 6mm in the centre and 3.5mm at the edges, the weight of the plate had been reduced to 630 grams and the tap tone had fallen to somewhere between C and C sharp and I was ready to glue it to the rib and neck assembly completed earlier.

dsc_0015-1

After the clamps have come off, it begins to look something like a cello.

dsc_0022

Unlike modern cellos, which have their necks morticed into the top block, baroque cello necks are simply glued and nailed. I say ‘simply’ but it’s a slightly nerve racking business partly because there’s little opportunity for later adjustment if the neck position isn’t absolutely right but also because, if the neck splits as the nails are driven in, a good deal of work is wasted. You drill pilot holes first, of course, but even so…

The first step is to prepare the neck and carve the scroll and pegbox.

dsc_0001-1dsc_0004-4

Then the partially completed neck is glued and nailed onto the top of the rib assembly. As the photograph shows, this is done upside down.

dsc_0011-3