Pictures are better than words when it comes to describing how to make something. So yesterday, I made a curved sole finger plane, keeping a camera within reach to record each step. I hope these photographs will be a useful supplement to the written instructions in my last post. Read across the rows to stay in sequence and click on any of the thumbnails for a larger view and (sometimes) more detailed comments.
-
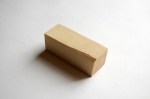
- Quarter sawn block of elder
-

- Lignum vitae
-

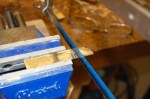
- Blade
-

- One flat surface on each block
-

- Gluing the two together
-

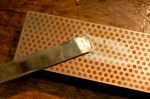
- Flattening the back of the blade
-

- Block planed square on all sides
-

- Sliced into a sandwich
-

- Checking the width of the middle of the sandwich
-

- Marking for the saw cuts
-

- Middle layer sawn
-

- How it goes back together
-
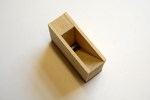
- How it goes back together (2)
-
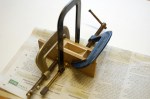
- Glueing it back together
-

- Re-assembled and glued
-

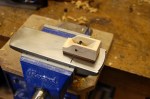
- Planing the sole
-

- Making a wedge
-

- Positioning the crossbar
-

- Drilling for the crossbar
-

- Drilled
-

- Turning the crossbar
-

- Checking with the blade and wedge
-
- Crossbar installed and glued
-

- Shaping the top (1)
-

- Shaping the top (2)
-
- Shaping the sole
-
- Shaped sole
-

- Adjusting the mouth
-
- Curving the cutting edge of the blade
-

- Trying it out
-
- Finalising the shaping of the top and throat
-

- Carving the wedge
-
- Cutting excess length from the blade
-

- The three parts finished
-

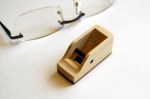
- … and assembled
-

- Testing
-

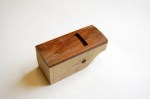
- Tight mouth
-

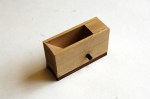
- The finished plane

3 Comments
Very fine work. I am impressed. Can you recommend a ready made group of planes. I’m planning on a line of mandolins.
Reblogged this on da Zêna.
Love the violin planes. I’m just making one but could you please clarify step 9 in the instructions regarding where to place the crossbar. A diagram would help as I’ve tried to follow the various parallel lines, combined thickness, third parallel lines instructions but ended up a little baffled. I know its not critical. Have picked up some really helpful tips along the way including the razor blade scraper. Thank you.
5 Trackbacks/Pingbacks
[…] want to find them, go to the bottom of the page and type plane into the seach box. Or click here, here and here. There’s also a short entry about them on the tools and jigs […]
[…] He makes the planes from European oak or boxwood and chisels them out of a solid block. This is a technique that I intend to re-visit. All the planes that I’ve made recently followed the Krenov method in which you start by sawing two slices off the block to make the sides of the plane, shape the bed and throat from the middle section, and then glue it back together. There are some photographs of this method of construction here and here. […]
[…] post, I’ll try to give a bit more detail and discuss modifications and refinements. (See here.) GA_googleAddAttr("AdOpt", "1"); GA_googleAddAttr("Origin", "other"); […]
[…] used the Krenov sandwich technique, which I’ve written about at length before. (See here and here. A few days ago, I tried Wouter’s method using a small block of lignum vitae, which I […]
[…] Source: More about violin-making planes | Finely Strung […]