The back went on yesterday, and now it really does look like a guitar.


The back went on yesterday, and now it really does look like a guitar.
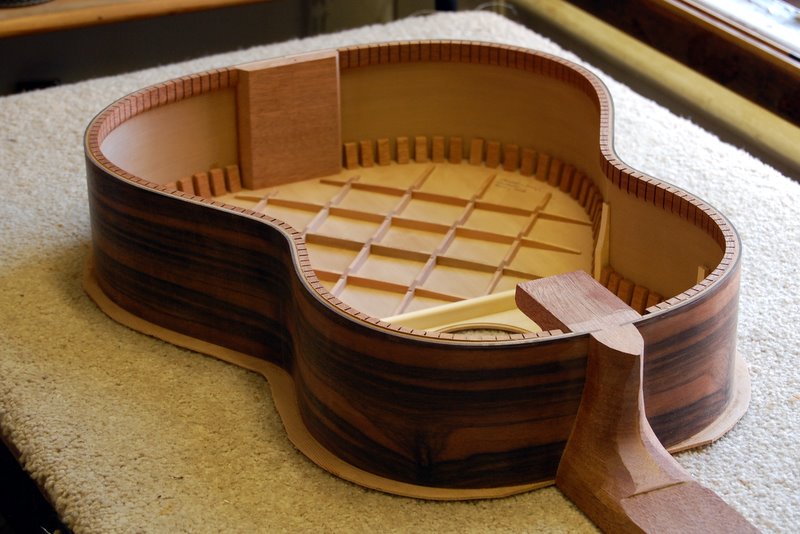
There’s a wonderful moment in guitar making when you begin to put the pieces together. Until this point, it’s just a collection of oddly shaped bits of wood. Suddenly, it becomes something well on the way to being a musical instrument. Here are a couple of photographs to show you what I mean.

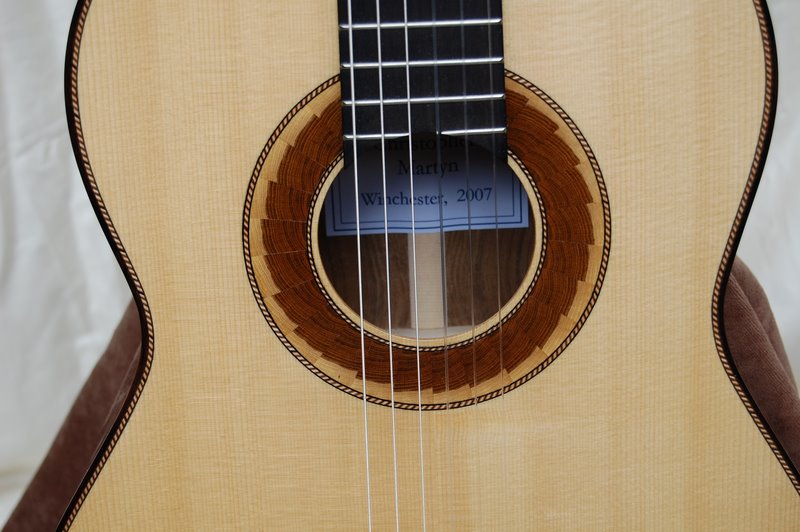
Although I haven’t written about it, I’ve been making steady progress with the guitar. I decided on a rosette of spalted apple wood and a cedar top with a lattice strutting system as you can see in these pictures:


Last autumn, I met Konrad Sauer at an exhibition of woodworking and woodworking tools held at Westonbirt Arboretum in Gloucestershire. He’s a plane maker and let me try out the small smoother (shown in the photograph below) on a piece of American walnut. It wasn’t a highly figured piece of wood but the grain was far from obliging. The plane worked perfectly, taking a full width, tissue paper thin shaving and leaving a surface that required neither scraping nor sanding before applying a finish. Even more impressive however, was the plane’s performance when I turned the board of walnut around. The finish this time wasn’t quite as polished – how could it have been? – but the fact that here was a tool that could take a shaving against the grain without leaving areas of roughness and tear out was a revelation. For a guitar maker constantly needing to work highly figured tropical hardwoods to a perfect finish, it was almost too good to be true. Of course, I asked him to make me one and though I try to be patient, I check his website from time to time hoping to read about progress.
The website is full of interesting things but it’s especially worth reading the ‘Nuts and Bolts’ section for his discussion of why he makes his planes almost entirely with basic hand tools. Some of the reasons are obvious: such tools cost less and take up less space in the workshop. Others are more subtle: working by hand, although apparently slower than working with machines, means that an error can be caught before it turns into a costly mistake. Taking an extra shaving with a handplane is much more controlled than using a machine with a cutter head revolving at 3,000 rpm – not to mention safer and quieter. And working by hand allows him to adjust the plane that he is making by, say, making its handle a bit smaller or its blade angle a bit steeper, so that it’s exactly as his customer want it. These are just the same reasons why I build musical instruments by hand.

I’ve been thinking about the rosette for this guitar. The traditional rosette on a classical guitar is a repeating mosaic pattern made up of thin strips of differently coloured woods often less than a millimetre square in size. It’s an elaborate and painstaking business to make and, though it’s heresy to say so, I’ve never thought that the results were very exciting. The pattern is just too fine to be appreciated, or even noticed, more than a couple of feet away. Besides, it’s too contrived, too finicky, too far removed from any function.
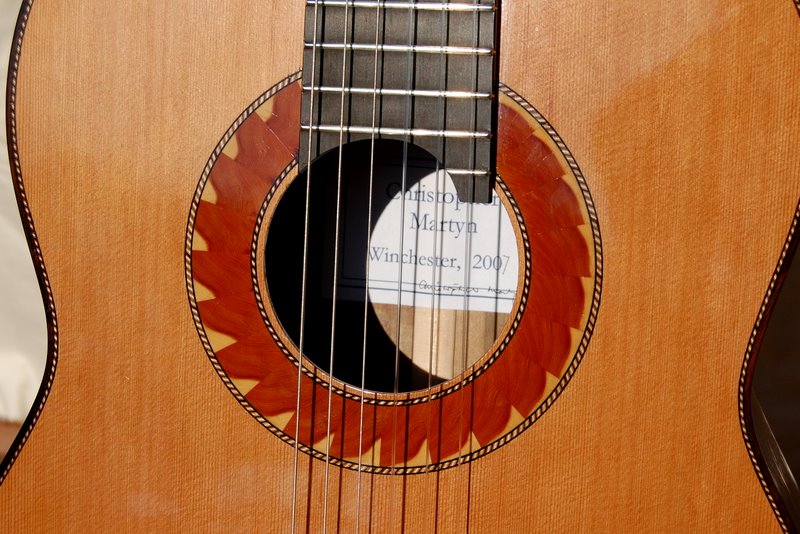
Trying to find a simpler and visually bolder solution I’ve been experimenting with inlays of saw cut veneer and you can see the results below. The rosette on the left is made out of laburnum by slicing a sector-shaped log containing both sapwood and heartwood across the grain, and arranging the slices in order around the sound hole. The one in the middle is made in the same way but using yew rather than laburnum – another wood with a striking contrast between sapwood and heartwood. On the right, the rosette is made of spalted crab-apple but orientated to display long grain, not end grain.

Click on thumbnails for an enlarged view.
I’m inclining towards using spalted crab-apple for the rosette of this guitar too. The creamy colour should make a striking contrast with the sandy colour of the cedar top that I intend to use. In a previous guitar, I carried the theme a bit further by using spalted crab-apple veneer for the headstock – an idea which might work with this guitar too.

My first instrument of 2008 is going to be a classical guitar. I jointed the back out of three pieces of nicely figured macassar ebony but already there’s a decision to be made. Macassar ebony rarely comes in pieces wide enough to make a back out of the usual 2 bookmatched pieces and this set was no exception. To achieve the necessary width across the lower bout, I put in an extra tapered piece in the centre. The result looks quite good, I think, but the question is whether the mismatch in figure at the joins is inconspicuous enough not to be a problem. Maybe it would be better to make a virtue of it by inlaying 2 backstripes? I’m going to put it aside while I decide. The pictures below give an idea. Any comments would be welcome.
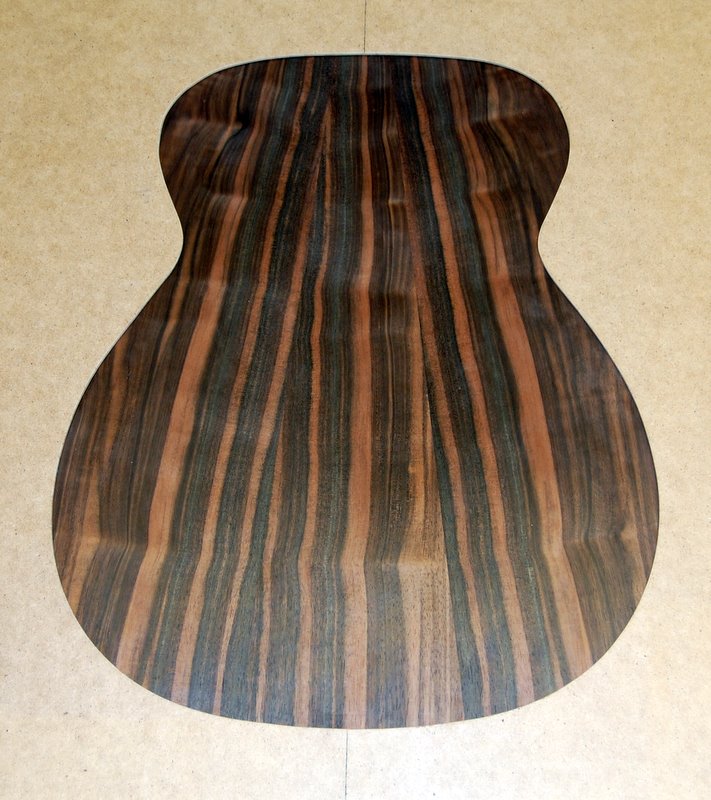
The picture above shows the back as it is at the moment.
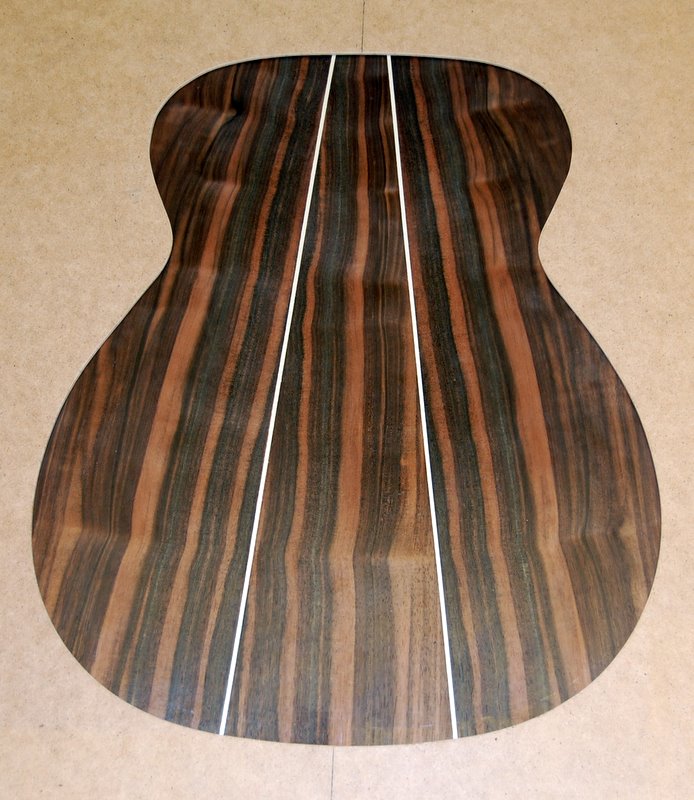
Here it is with two bands of light coloured wood placed on top to give an idea of what it would look like with inlay. Bear in mind that the bands would be narrower and that, on the finished instrument, they will link up with a similar coloured border – the purfling – around the edges.
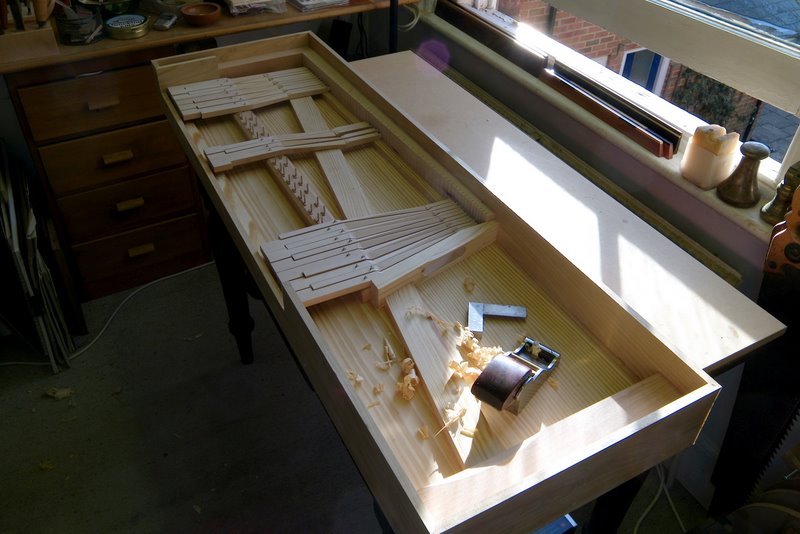
Here are a few pictures taken in my workshop during the early stages of building the instrument.

Preparing a board of cherry for the case.
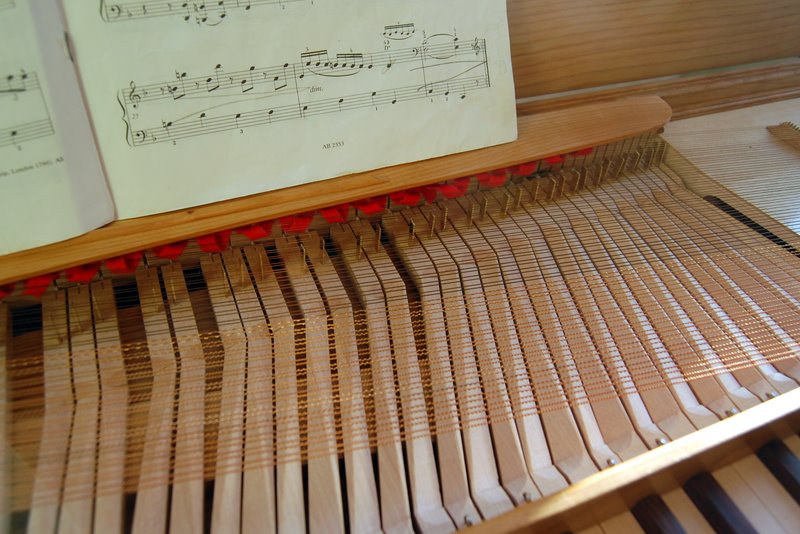
Case nearly complete with diagonal brace, hitchpin rail, balance rail and wrest plank fitted.

Fitting the key levers.
I just managed to get this double-fretted clavichord finished by the end of 2007. The casework and stand are made in English cherry with an oiled finish. It has just over 4 octaves (from C to e”’) and is a copy of an instrument by an anonymous maker built around 1740 and preserved in the Gemeentemuseum in the Hague.

Click on the thumbnails for more pictures.