Over the years, I’ve learnt a lot and picked up many good ideas from other people’s woodworking and instrument making websites. So, to return the favour, here’s a collection of shop-made tools and jigs and workpiece fixtures that I’ve found useful. Few, if any, of the things here were my idea originally, although I may have made modifications, and I’ve done my best to acknowledge the sources. As various tools and jigs have been added, the page has grown to an unwieldy length. Here’s a list of topics in the order that they appear so that, if you’re looking for something in particular, you can scroll straight to it.
- Finger planes
- Holding and clamping awkwardly shaped pieces
- Sharpening small or short blades
- Jig for a Dremmel for routing rosettes and soundholes
- Fret bevelling file
- Cello clamps
- Using rare earth magnets to tame a cello wolf note
- Dovetail marker
- Dovetail vice
- Router table for a Dremmel
.
.
.
Finger planes
Here are three photographs of cello and violin making planes that I’ve made. There’s a Record No 4 in the background of the first picture to give a sense of scale. These planes are, of course, much cheaper to make than buy and they work pretty well. Should you want to construct one, there are some fairly detailed instructions here.
.
.
.
Dealing with tapered shapes
It’s hard, if not impossible, to plane a taper on small pieces of wood on the bench top or held in a vice. This very simple fixture makes it a lot easier. It’s no more than a thick wedge of hardwood with a thin stop of plywood glued to one end and a block glued to the bottom so that it can be held in a bench vice.
After seeing the pictures above, Jeff Peachey sent me a comment to say that he had made something similar in order to plane small thin pieces of wood. He sent me the photograph below of his device, which has the advantage of an adustable (and replaceable) stop.
I’ve since made a modification to my jig to incorporate this useful feature. See here.
Another simple device enables tapered pieces to be firmly held in a vice. It’s a sort of accessory vice jaw with one gently curved side that can swivel to accommodate the work piece. The flat side is lined with cork and a thin sheet of plywood is glued to the top to keep it in position while the vice is tightened.


Since I wrote this short piece about holding tapered forms, I’ve made a slightly more complicated and elaborate vice to cope with them. It works particularly well for complex shapes such as the heads of violin and cello bows. There’s a detailed description here.
Sharpening small or short blades
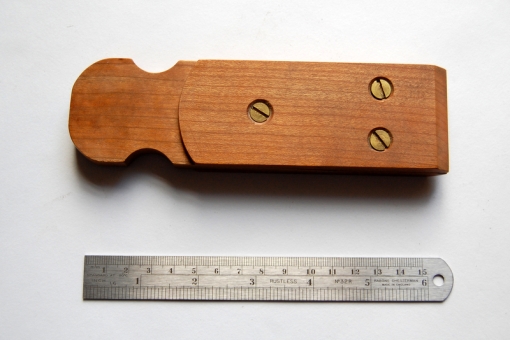
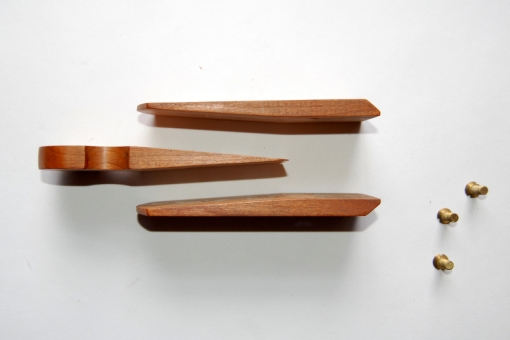
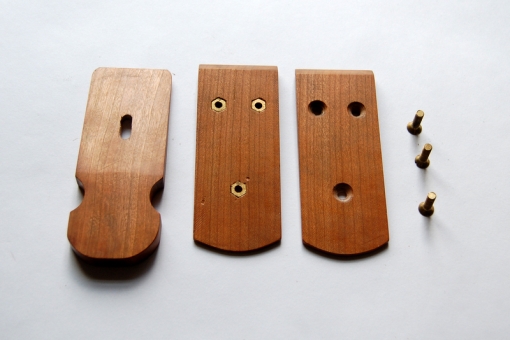
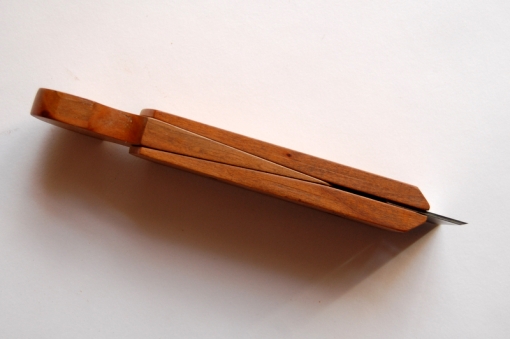
I’m a fan of honing jigs for sharpening chisels and plane blades. They make the job faster and more accurate. But they often won’t accommodate short blades of the sort found, for example, in spokeshaves or thumb planes. Here’s a wooden holder that solves the problem. I copied the idea from David Charlesworth’s book Furniture-Making Techniques (ISBN 1 86108 125 1). It may look unnecessarily elaborate but it’s not hard to make and the design of the wedge means that the jaws can be adjusted to be parallel for a variety of blade thicknesses, which means that they always grip the blade firmly.
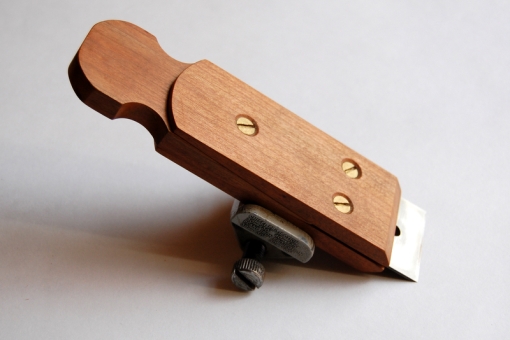
Here are some photographs that I hope will make its construction clear:
.
.
.
Holding and clamping awkwardly shaped pieces
Making instruments often means that you have to work with small or curved pieces of wood that are difficult to hold in a woodworking vice or to clamp to the bench top. One useful technique for dealing with them is to make a mould out of quick-setting wood filler. In essence, you take a casting of the awkwardly shaped piece itself – using a layer of clingfilm to prevent the piece sticking to the filler.
After curving the upper surface of a tailpiece for a baroque cello, I needed to turn it over and hold it steady to plane the underside smooth and to hollow it out. Here’s a photograph of the tailpiece showing the compound curve of the top, which is convex across and, harder to see, gently concave along its length.
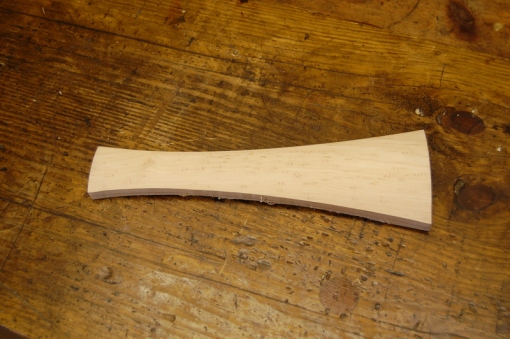
Here’s how I made a fixture to hold it:
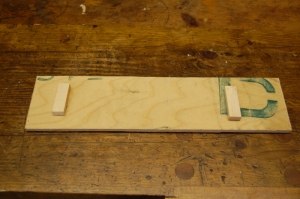
Glue two stops to a plywood offcut to hold the tailpiece longitudinally
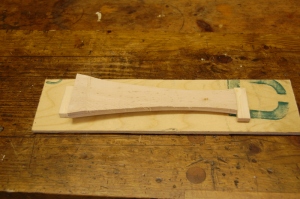
The tailpiece in position between the stops
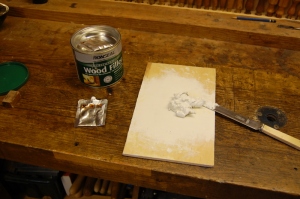
Mixing filler and catalyst
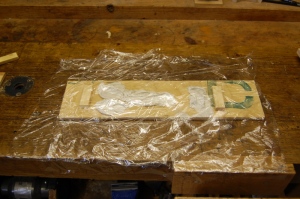
Dollop the resin between the stops and cover with clingfilm
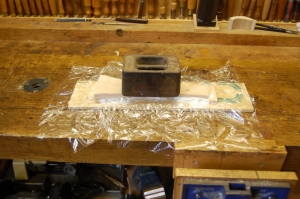
Push the tailpiece into position and add a weight
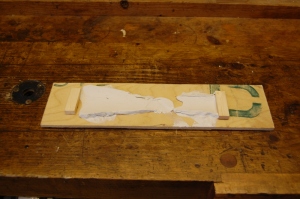
20 minutes later the mould is hard
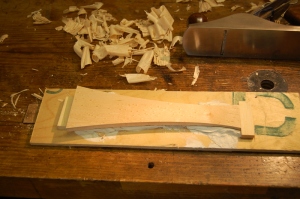
Planing the underside with the tailpiece held steady and supported along its length
A variant of this technique can also be used to make accurately shaped cauls for clamping irregular or difficult shapes.
.
.
.
Jig for using a Dremel to rout rosettes and soundholes
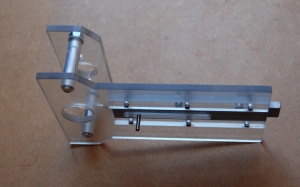
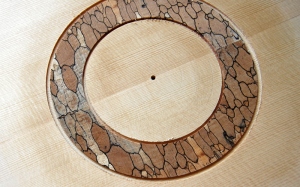
Below are some photographs of a jig that I made to rout guitar fronts to receive inlaid rosettes. It’s made from 6mm polycarbonate. The device rotates around a 3mm diameter silver steel pin that projects through a slit in the base. This pin is held in a strip of aluminium that can slide to and fro in a housing on the top of the base plate so that the radius of the cut can be adjusted. Two (just to be on the safe side) machine screws tapped through the top of the housing hold the slider in the desired position. The Dremel is mounted on the top by taking off the collar above the collet, which reveals a 3/4 inch diameter 12tpi BSF thread, and screwing it in to the mounting. The mounting plate (obviously tapped to receive the Dremel thread) is positioned above the base plate on 2 10mm aluminium rods. The depth of the cut is adjusted by altering the position of the router bit in the collet.
It’s not hard to make, even without access to a lathe, but you will need to obtain a 3/4 inch 12tpi BSF tap to thread the mounting plate for the Dremel. (Tracy Tools in the UK will sell you one for about £5.00.)
.
.
.
Fret bevelling
Here’s a simple device for bevelling the end of the frets on a guitar fingerboard. It’s no more than a block of wood with one side planed to make an angle of 60° with the base, a 6 inch file with the tang taken off and 2 thin strips of wood screwed into the block to hold the file in place. It’s much quicker and more accurate than using a hand held file and there’s no danger of marring the edge of the fingerboard or the upper part of the soundboard or of running the end of the file into the headstock.
Stick a strip of 600g wet and dry paper to one side of the file with double sided tape and the same device will polish the fret ends too.
You can buy something rather similar from Stewart-MacDonald, but it will cost you around $60.
.
.
.
Cello clamps
Below are some photographs of workshop made cello clamps. I think that they’re an improvement over the usual spool clamps because, like the dedicated cello clamps made by Herdim®, they exert pressure directly over the ribs rather than on the edge of the plates. Unlike the Herdim® clamps, they’re cheap. I hope the photographs make it clear how the clamps are constructed but see this post for more details.
The same principle also works for shorter clamps. The one below is designed for crack repairs. Shallow cleats are temporarily glued either side of the crack, which the jaws of this clamp can grip to close the gap.
Here are the clamps in action.
.
.
.
Taming a wolf with rare earth magnets
Rare earth magnets are cheap and widely available. They have all sorts of uses including, I discovered recently, finding the best position for and the optimum weight of a cello wolf note suppressor. The type I used for this purpose was 10mm in diameter, 3mm in thickness and each weighed about 2 grammes. Here’s a stack of them.
Using a Dremmel cut-off wheel and a slipstone, I ground a slot in 2 of them roughly the diameter of the C and G strings in width but leaving the depth just a touch on the shallow side.
In combination with a second magnet, the grooved magnet will clamp onto the string firmly enough to stay in place while the instrument is played – see below.
One obvious advantage of using magnets is that they’re easy to remove and re-position. Another is that by adding more magnets it’s possible to change the mass on the string and find the minimum required to suppress the wolf. Below, I discovered that 4 magnets (mass of about 8 grams) on the C string tamed the wolf almost completely. There’s a longer post about wolf notes on the cello here.
.
.
.
Dovetail marker
Several different designs of dovetail marker can be bought but none, in my view is as quick and easy to use as this shop-made one. It comes from Robert Wearing’s book, The Resourceful Woodworker (ISBN 0 7134 8006 8), and is fairly easily made from a sheet of brass 1 to 2 mm thick. The great advantage over the type that Lie-Nielsen and Veritas make is that you only have to set out the centre position of the pins on the edge of the board. The triangular ‘window’ of the marker then lets you see exactly where you’re marking out the joint. It works equally well whether you prefer to cut the pins or the tails first. The original post describing this marker is here.
.
.
.
Dovetail vice
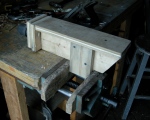
Cutting dovetails is much easier if you’ve got a proper vice. Because of the position of the screw and slide bars in most bench vices, it’s only possible to grip the edge of the board that you’re dovetailing. A dovetailing vice, on the other hand, grips the whole work piece, preventing it vibrating and aiding accurate sawing. They are especially valuable for wide boards but they’re good for smaller pieces too. Like the dovetail marker described above, this idea came from Robert Wearing’s book, The Resourceful Woodworker, (ISBN 0 7134 8006 8). He uses threaded metal bars to provide the clamping force but I cannibalised the wooden handscrews from an old clamp that I picked up in a second hand tool shop. The vice is simply cramped to the top of the bench when needed.
The vice has another use for guitar makers. If the screws are long enough, the jaws will open wide enough to accommodate the body of a guitar, which facilitates working on the tail stripe.
The original post about dovetail vices is here.
.
.
.
Router table for a Dremmel
When making guitar bridges, I use this device to cut a channel for the saddle and the tie block. It’s an adaptation of an idea in an article in Fine Woodworking (No 182, February 2006) where Doug Stowe described how he made something rather similar for a full size router. There’s a brief description of his table here where there’s also a link to a full explanation and downloadable free plans.
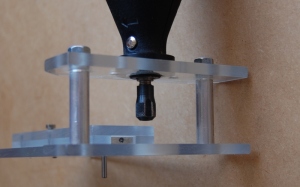
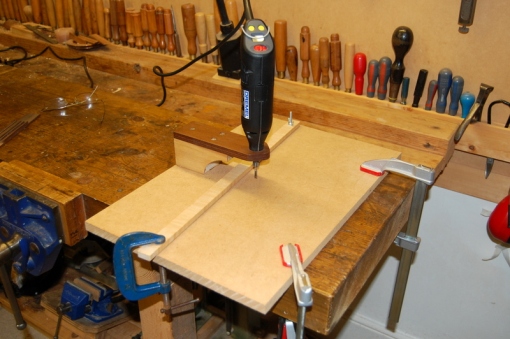
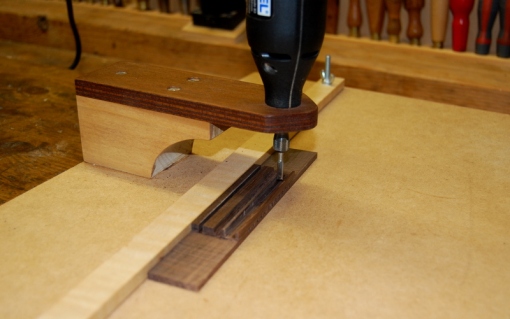
In my table, the Dremmel is mounted overhead on a cantilever. The table itself is a board of mdf. The adjustable fence is simply a straight strip of wood that pivots at one end and that is clamped at the other – an arrangement that allows a remarkable degree of precision. Depth of cut is controlled by the position of the router bit in the collet. The Dremmel isn’t powerful enough to cut slots to their full depth in one pass so, to avoid the fiddly business of repeatedly having to change the position of the router bit in its collet, I place a shim of thin (around 1.0mm) plywood under the workpiece for each subsequent pass.
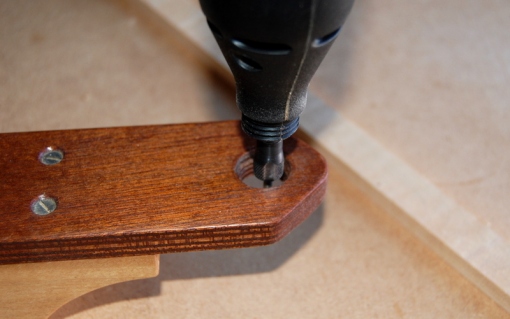
The only bit about making the table that’s not straightforward is how to mount the Dremmel firmly and vertically in the cantilever in a way that allows removal. I solved the problem by buying a 3/4 inch diameter 12tpi tap, which matches the thread on the nose of the Dremel when the collar above the collet is removed. Then it was only a matter of drilling an undersized hole and tapping it out.
The table is quick and easy to set up and it doesn’t take up much room in the cupboard when it’s not being used. It isn’t big enough to deal with anything very large, of course, but for making guitar bridges it works fine.
Original post here.







11 Comments
Nice site. I made a similar jig for holding thin pieces of wood, but made the stop adjustable.
exelentes dicas sobre ferramentas jig e rossetas grato pela ajuda. sou luthier nas horas vagas , e violonista de chorinho.aqui no brasil e muinto raro se conseguir ferramentas de qualidade para luthieria.as poucas que tenho foram criadas a patir de dicas como as sua mas uma vez obrigado.
Obrigado. Estou feliz que você achou útil.
That dovetail marking tool is simply beautiful.
I planning to build my first in September. Iam a woodworker and I would love to build my own tools.
I would love to get the specs for building a jig for using a dremel
Very nice Tools, and thank you for sharing :)
Loved this……………………too many things to comment on…..very useful, THANKS
Thank you for putting this together. I am starting Guitar One and appreciate all the help I can find.
Tank you!
Very usseful tips,
These are good ideas put to use.
Sou um aprendiz da arte de construir de tudo u. Pouco.
Venho estudado a construção de intrumento de caixa acústica .
Grato muito bom
12 Trackbacks/Pingbacks
[…] Strung A diary about making stringed musical instruments AboutContactGalleryHomeWorkshopMusicTools and jigs « More on […]
[…] Strung A diary about making stringed musical instruments AboutContactGalleryHomeWorkshopMusicTools and jigs « Toothed blade for planing […]
[…] Strung A diary about making stringed musical instruments AboutContactGalleryHomeWorkshopMusicTools and jigs « Making rosettes for a classical […]
[…] Strung, and is a stringed instrument maker in Winchester, United Kingdom, came up of a surprisingly similar jig. We exchanged some information on the topic and he posted an image his jig and mine, although his […]
[…] Tools and jigs « Beam theory […]
[…] Tools and jigs « Jig for planing wedges […]
[…] Tools and jigs […]
[…] Tools and jigs […]
[…] Tools and jigs […]
[…] Download Plan More @ finelystrung.com […]
[…] Source: Tools and jigs | Finely Strung […]
[…] Finely Strung’s blog, there is this cool jig idea for […]